
Your iPhone is indispensable if you’re freelancing. It allows you to generate and modify content, search for jobs, and talk with customers.
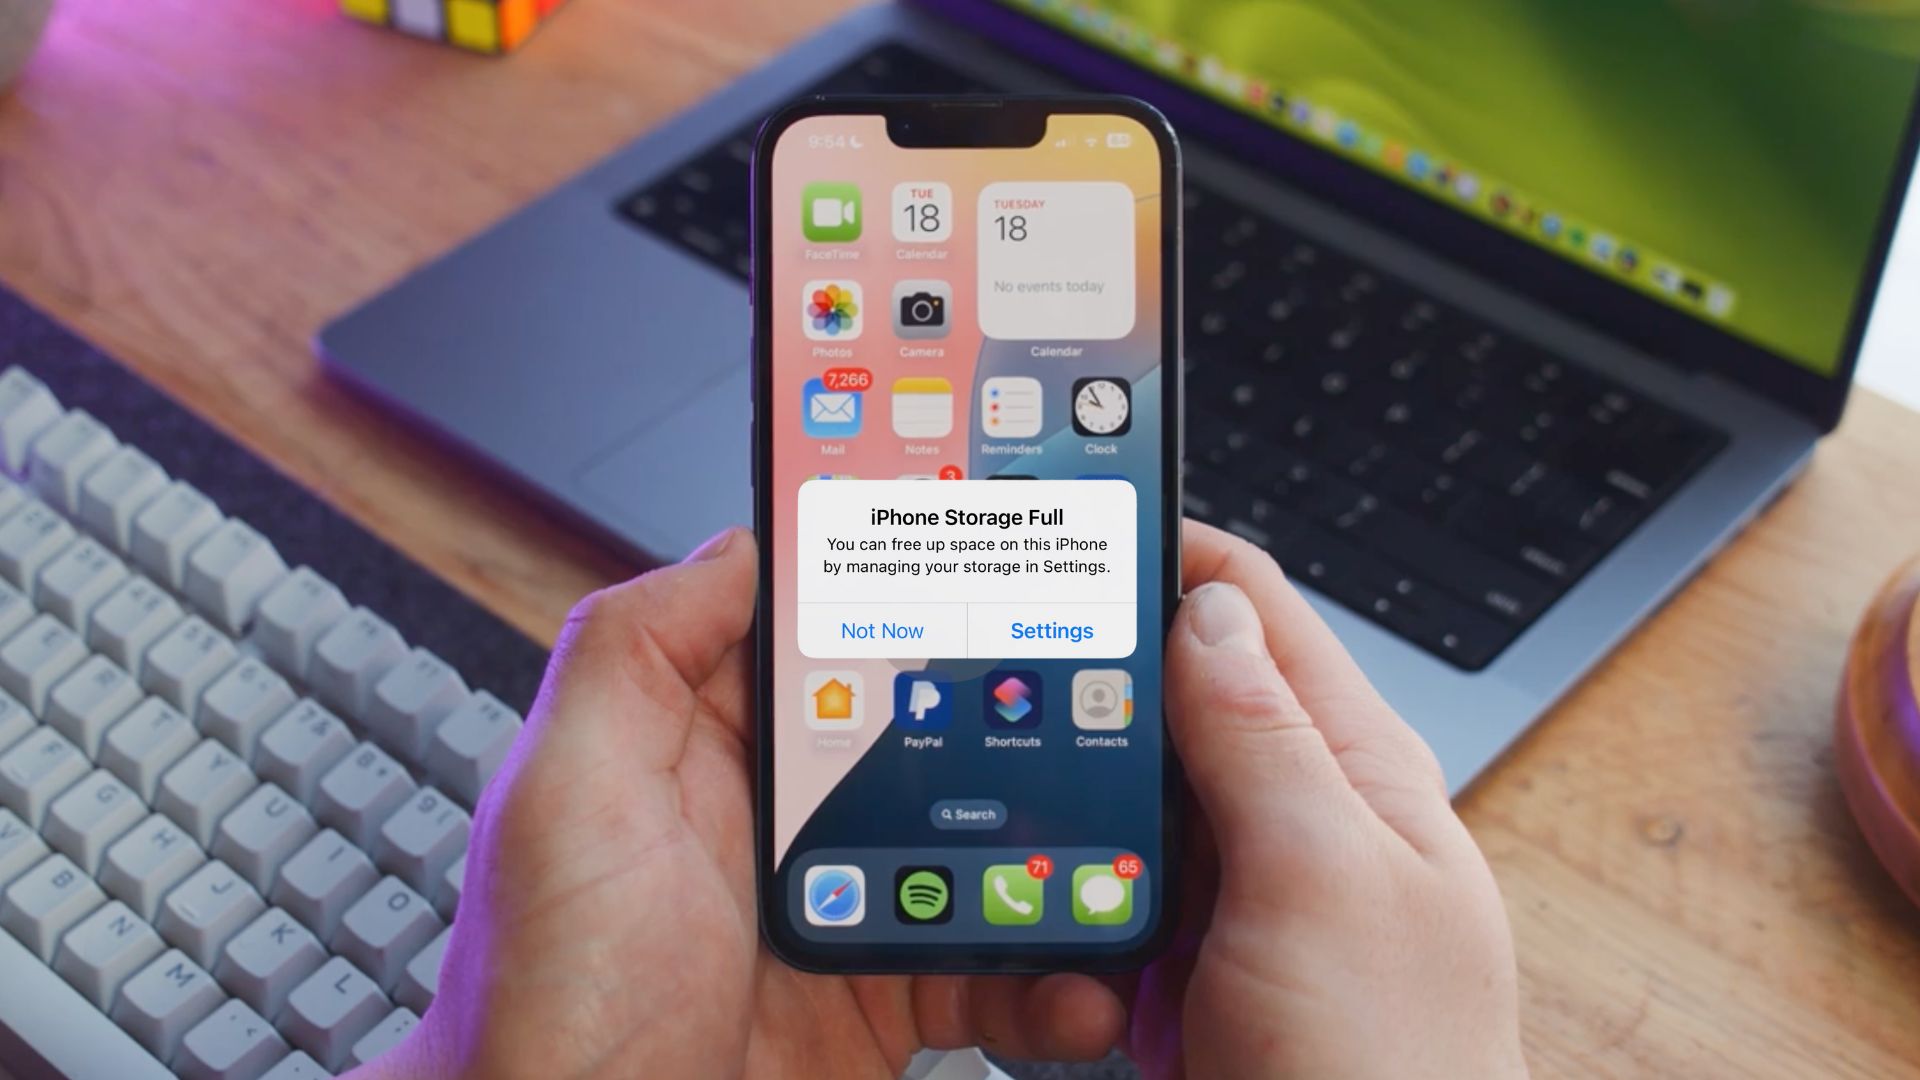
When you have an office job, your primary device is usually a computer or company-issued phone with specific usage restrictions during the workday, so your iPhone mostly stays personal. But freelancing is different. Most freelance work, such as copywriting, translation, video filming and editing, social media management (SMM), photography, and so on, can be completed solely on an iPhone. It is no wonder that your phone will become full of unnecessary or old files in no time, ultimately slowing it down.
So, it’s smart to occasionally clear your iPhone’s storage to improve or stabilize its performance. In this article, we’ll share the best methods to free up space quickly and get your phone running smoothly again.
How to Clean Up iPhone Storage
Since freelance work covers so many different types of tasks, there’s no one-size-fits-all approach to clearing iPhone storage. That’s why this section focuses on general, go-to methods that work across the board. Based on conversations on Reddit, about half of freelancers use the same iPhone for both work and everyday life, while the other half use separate devices. So no matter how you’ve set things up, these tips will help you keep your phone running smoothly.
Remove Unnecessary Media Content
Your iPhone probably has some important images stored on it, like the content you created for brands, but it also has plenty of unnecessary or outdated photos you could safely delete without losing anything valuable. Still, you probably don’t want to waste hours sorting through them when you could be working and earning money (which, judging by reviews, can be pretty substantial). That’s why we recommend using an iPhone cleaner app like Clever Cleaner: AI CleanUp App, which handles all the work for you.
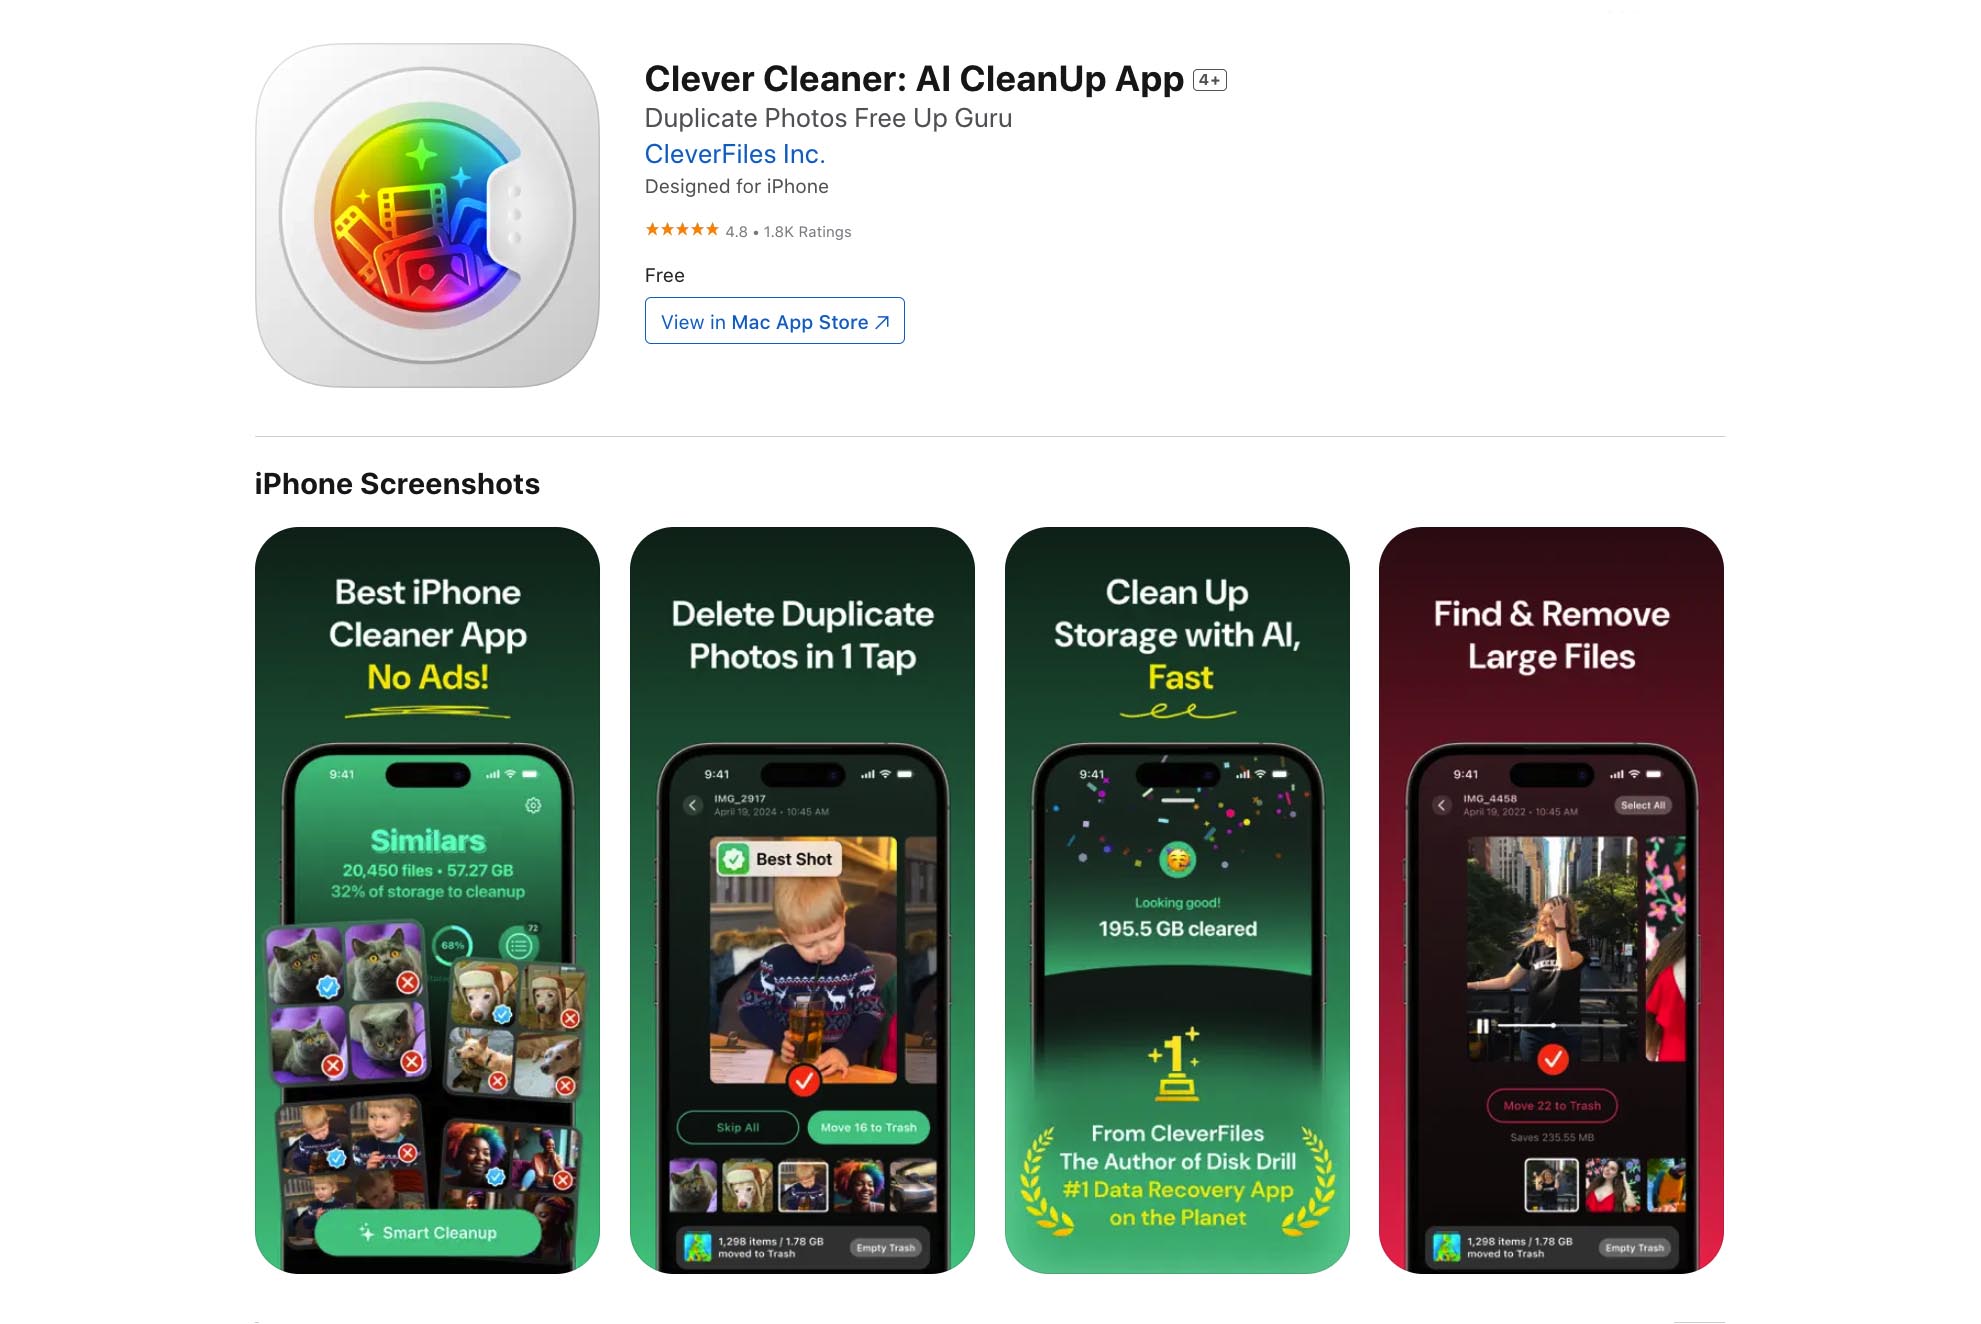
This app is completely free and helps you easily remove duplicate or similar photos, screenshots, large media files, and even compress live photos. We’ll concentrate on the “Similars” feature, which specifically targets duplicates and similar images since you probably don’t realize how many of these are cluttering your iPhone. Clearing them out can quickly free up several (or even dozens) gigabytes. If you think the app’s other features might be more helpful for your needs, you can check out the official website of Clever Cleaner for iPhone or its App Store page to learn more.
- Search for Clever Cleaner in the App Store and install it on your work iPhone. Or, if it’s easier, just head to the official website and use the link there – it’ll take you straight to the App Store.
- Once you open the app, give it access to your photo library. After you grant permission, the app will scan your photos.
- When the scan is done, you’ll see groups of duplicate and similar photos. The app’s AI will automatically pick the best version in each group and mark the others for possible deletion.
- Tap into a few groups to see if you agree with the selections. If everything looks good, go back to the main screen and hit the ‘Smart Cleanup’ button to delete all unnecessary copies in one go.
- If you want more control, you can change which photo gets kept and manually choose what to delete. Just tap into any group, make your picks, and hit ‘Move to Trash.’
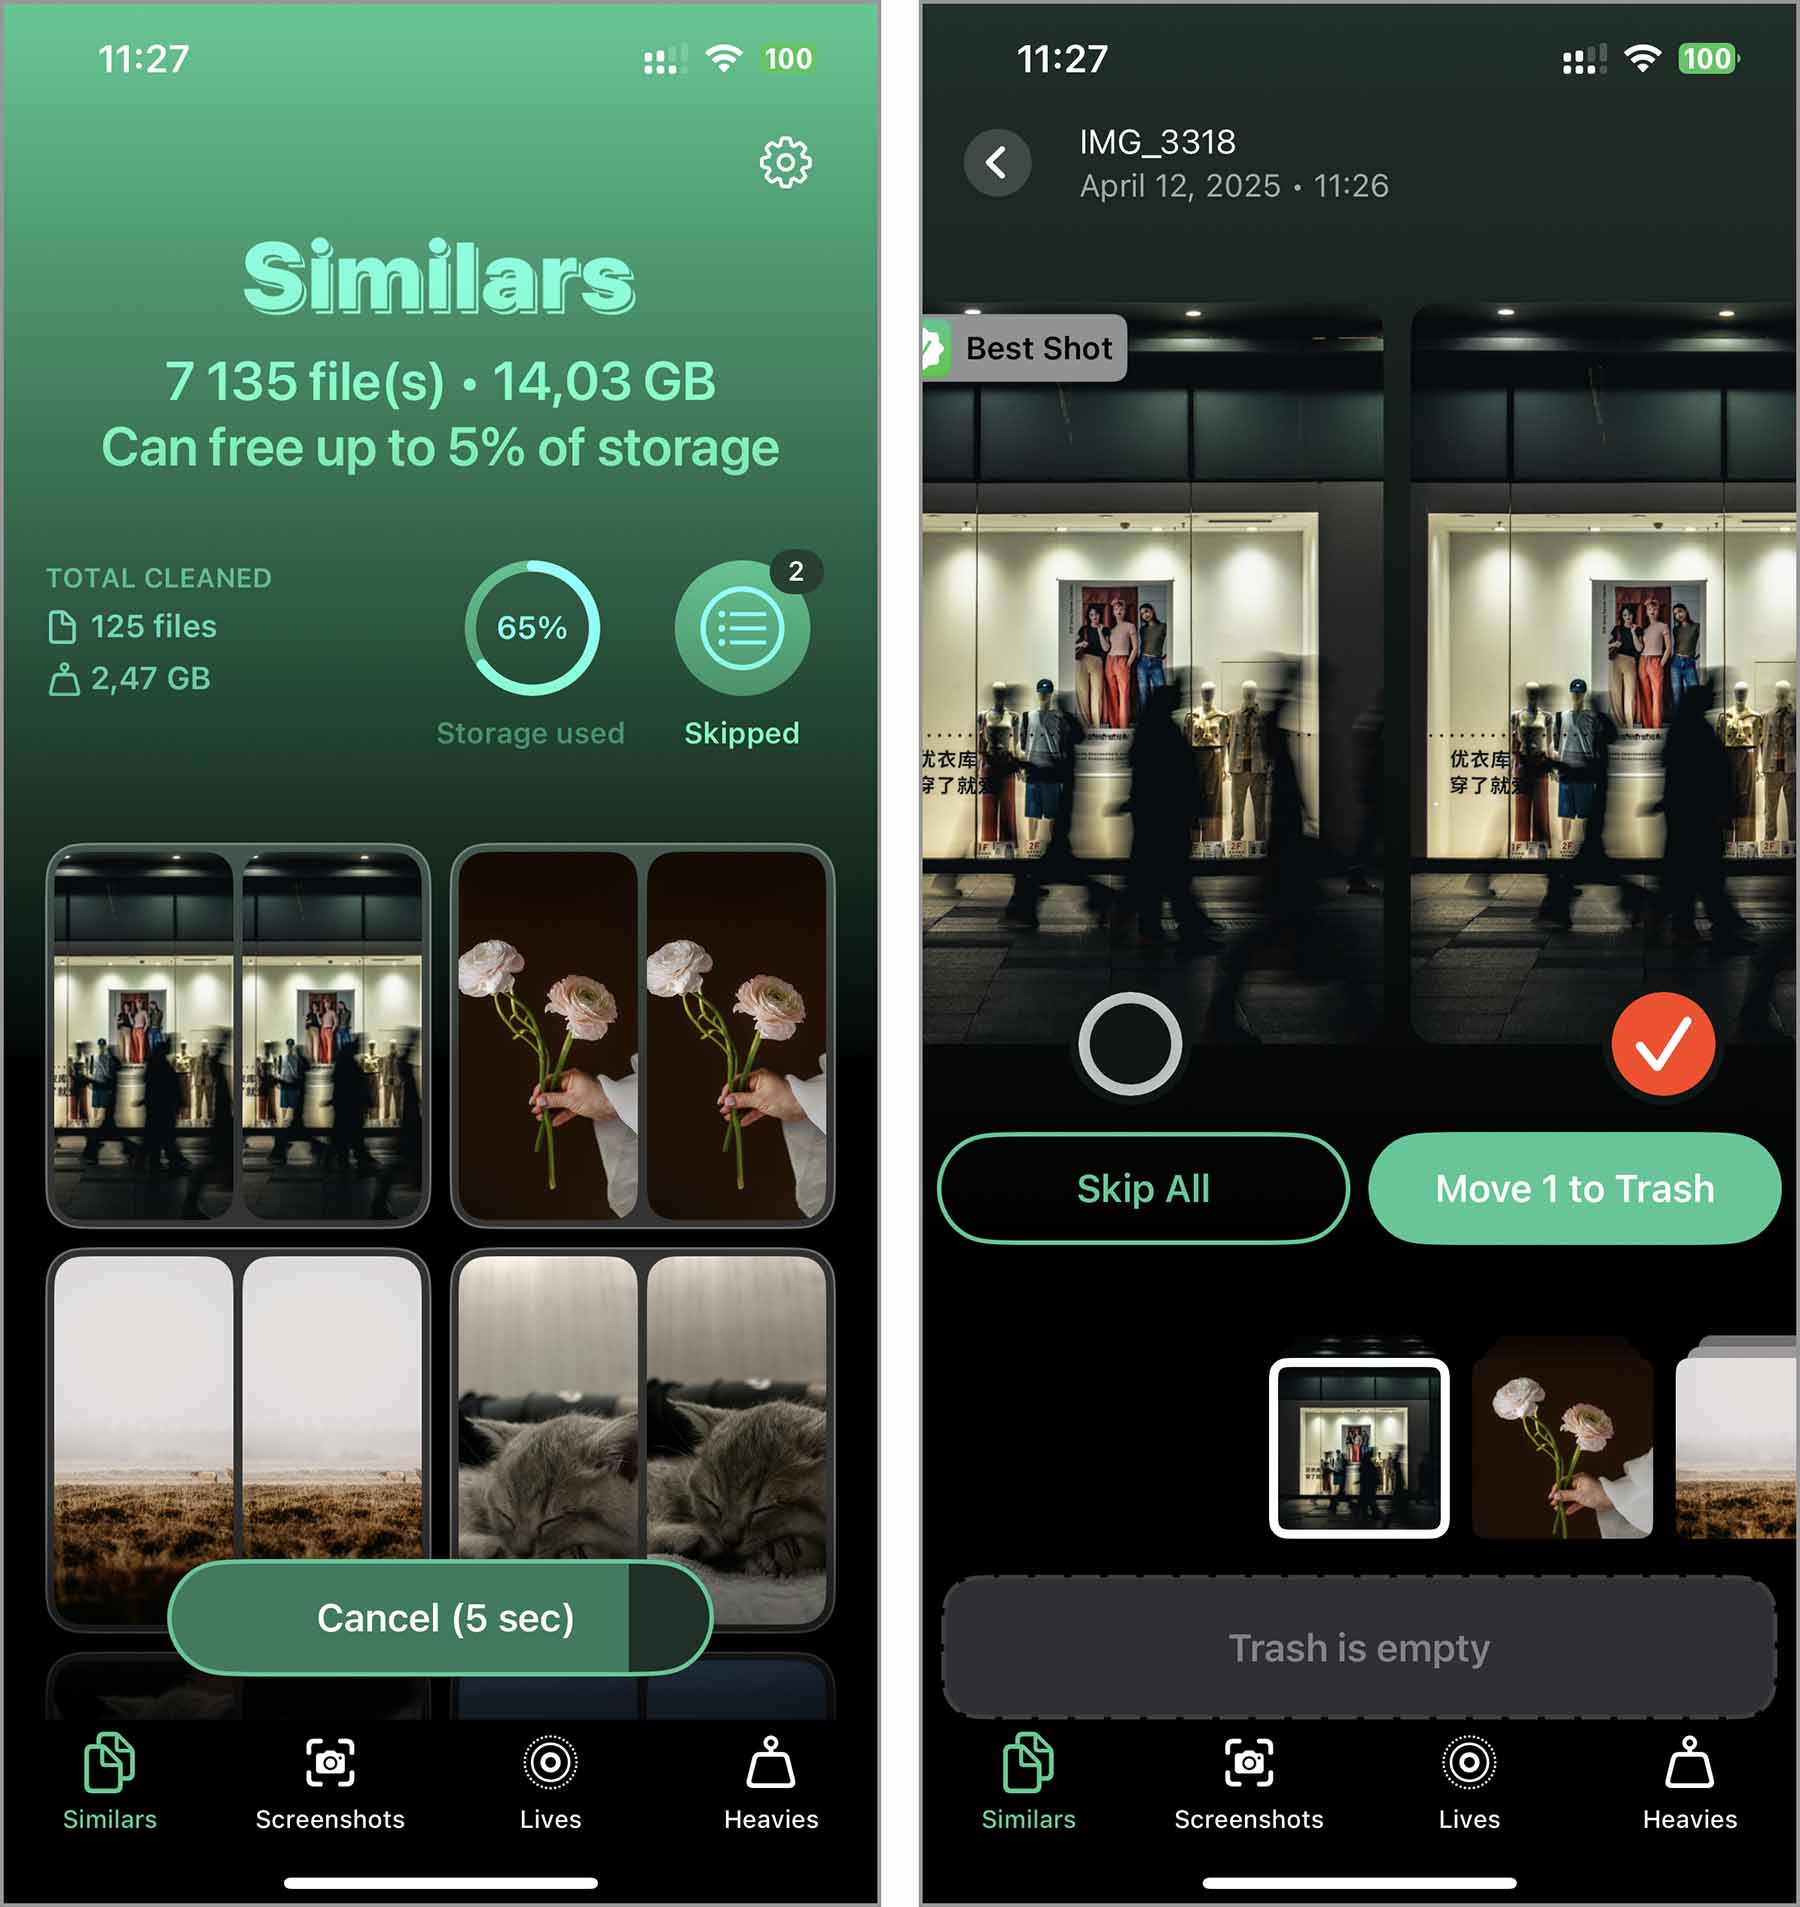
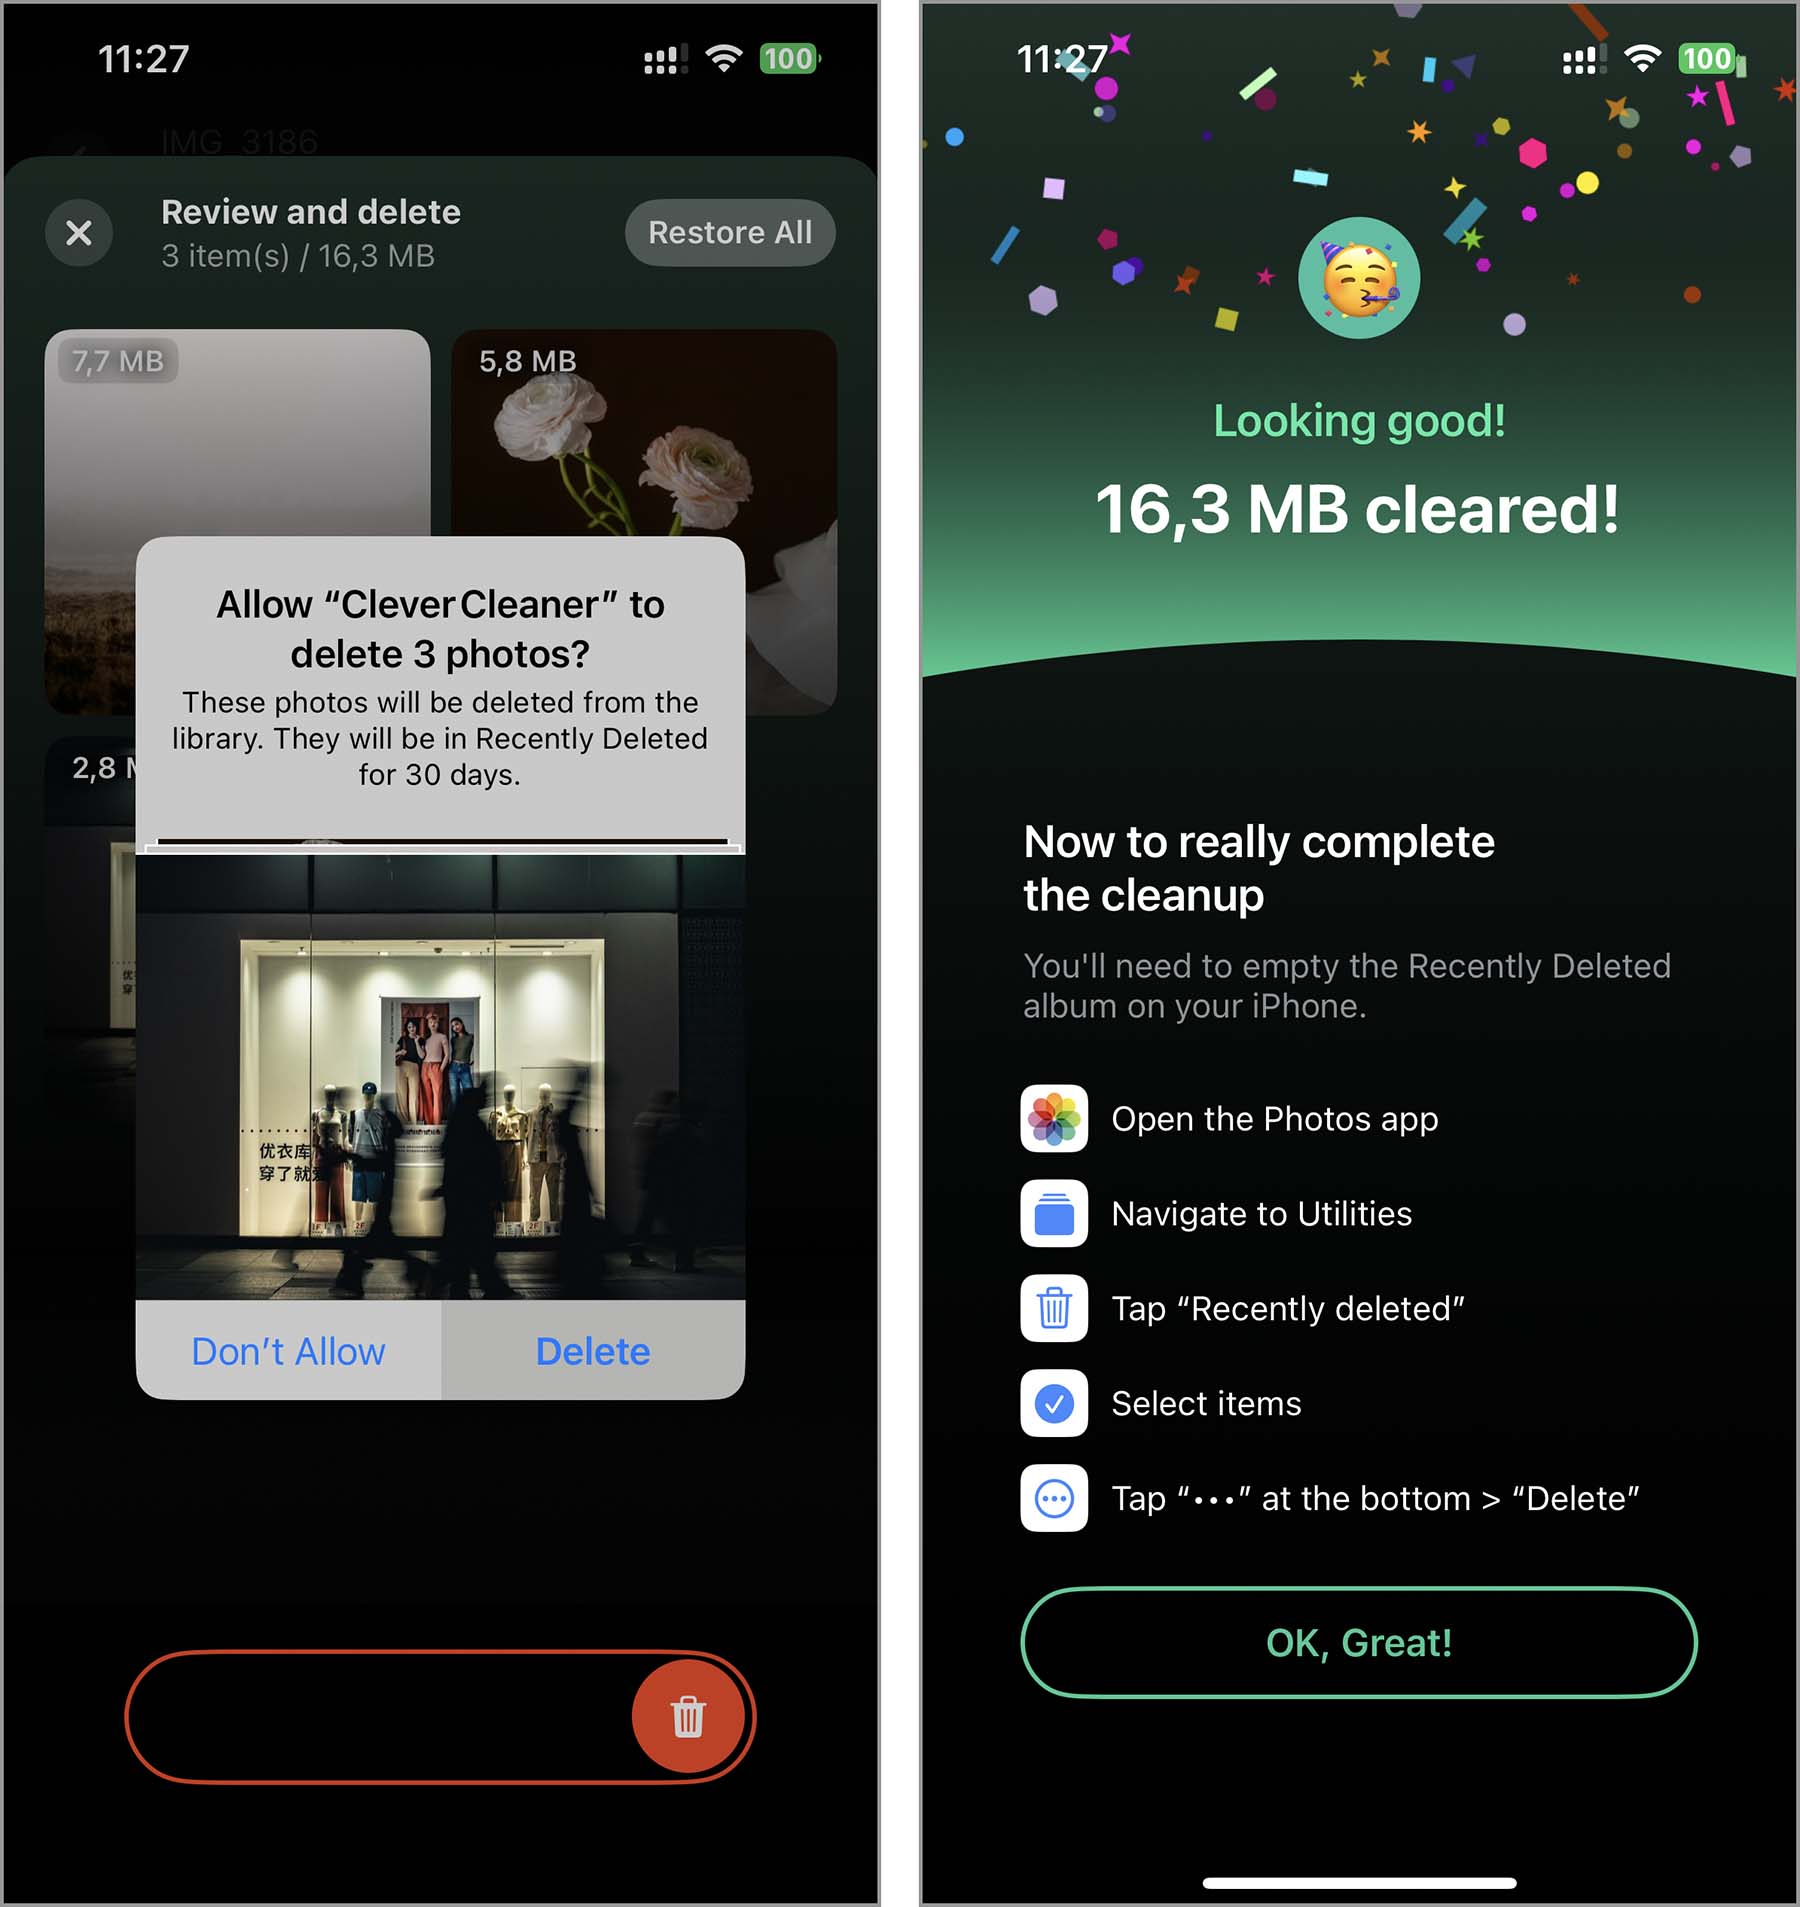
- All deleted photos go into the app’s trash first, giving you a chance to double-check. If you want to review them, tap the pop-up at the bottom, look through the files, and slip ‘Slide to Delete’ to confirm the final deletion. If you’re confident everything’s good, just tap ‘Empty Trash’ in the pop-up.

- The selected photos will then move to the Recently Deleted album in your iPhone’s Photos app. The app will suggest clearing that folder right away to clean up iPhone storage and provide steps on how to do it. If you skip it, those files will still sit there for 30 days before they’re permanently deleted.
If, for whatever reason, you’d rather not use the app (maybe you’re not comfortable with how automated it is or just prefer more control), you can learn more ways on how to remove duplicate photos on an iPhone here: https://www.cleverfiles.com/howto/remove-duplicate-photos-iphone.html
Use Cloud Services
If you don’t want to delete any media from your iPhone, there’s another option – move everything to cloud storage. There are a few different services that can help, and each one works a little differently.
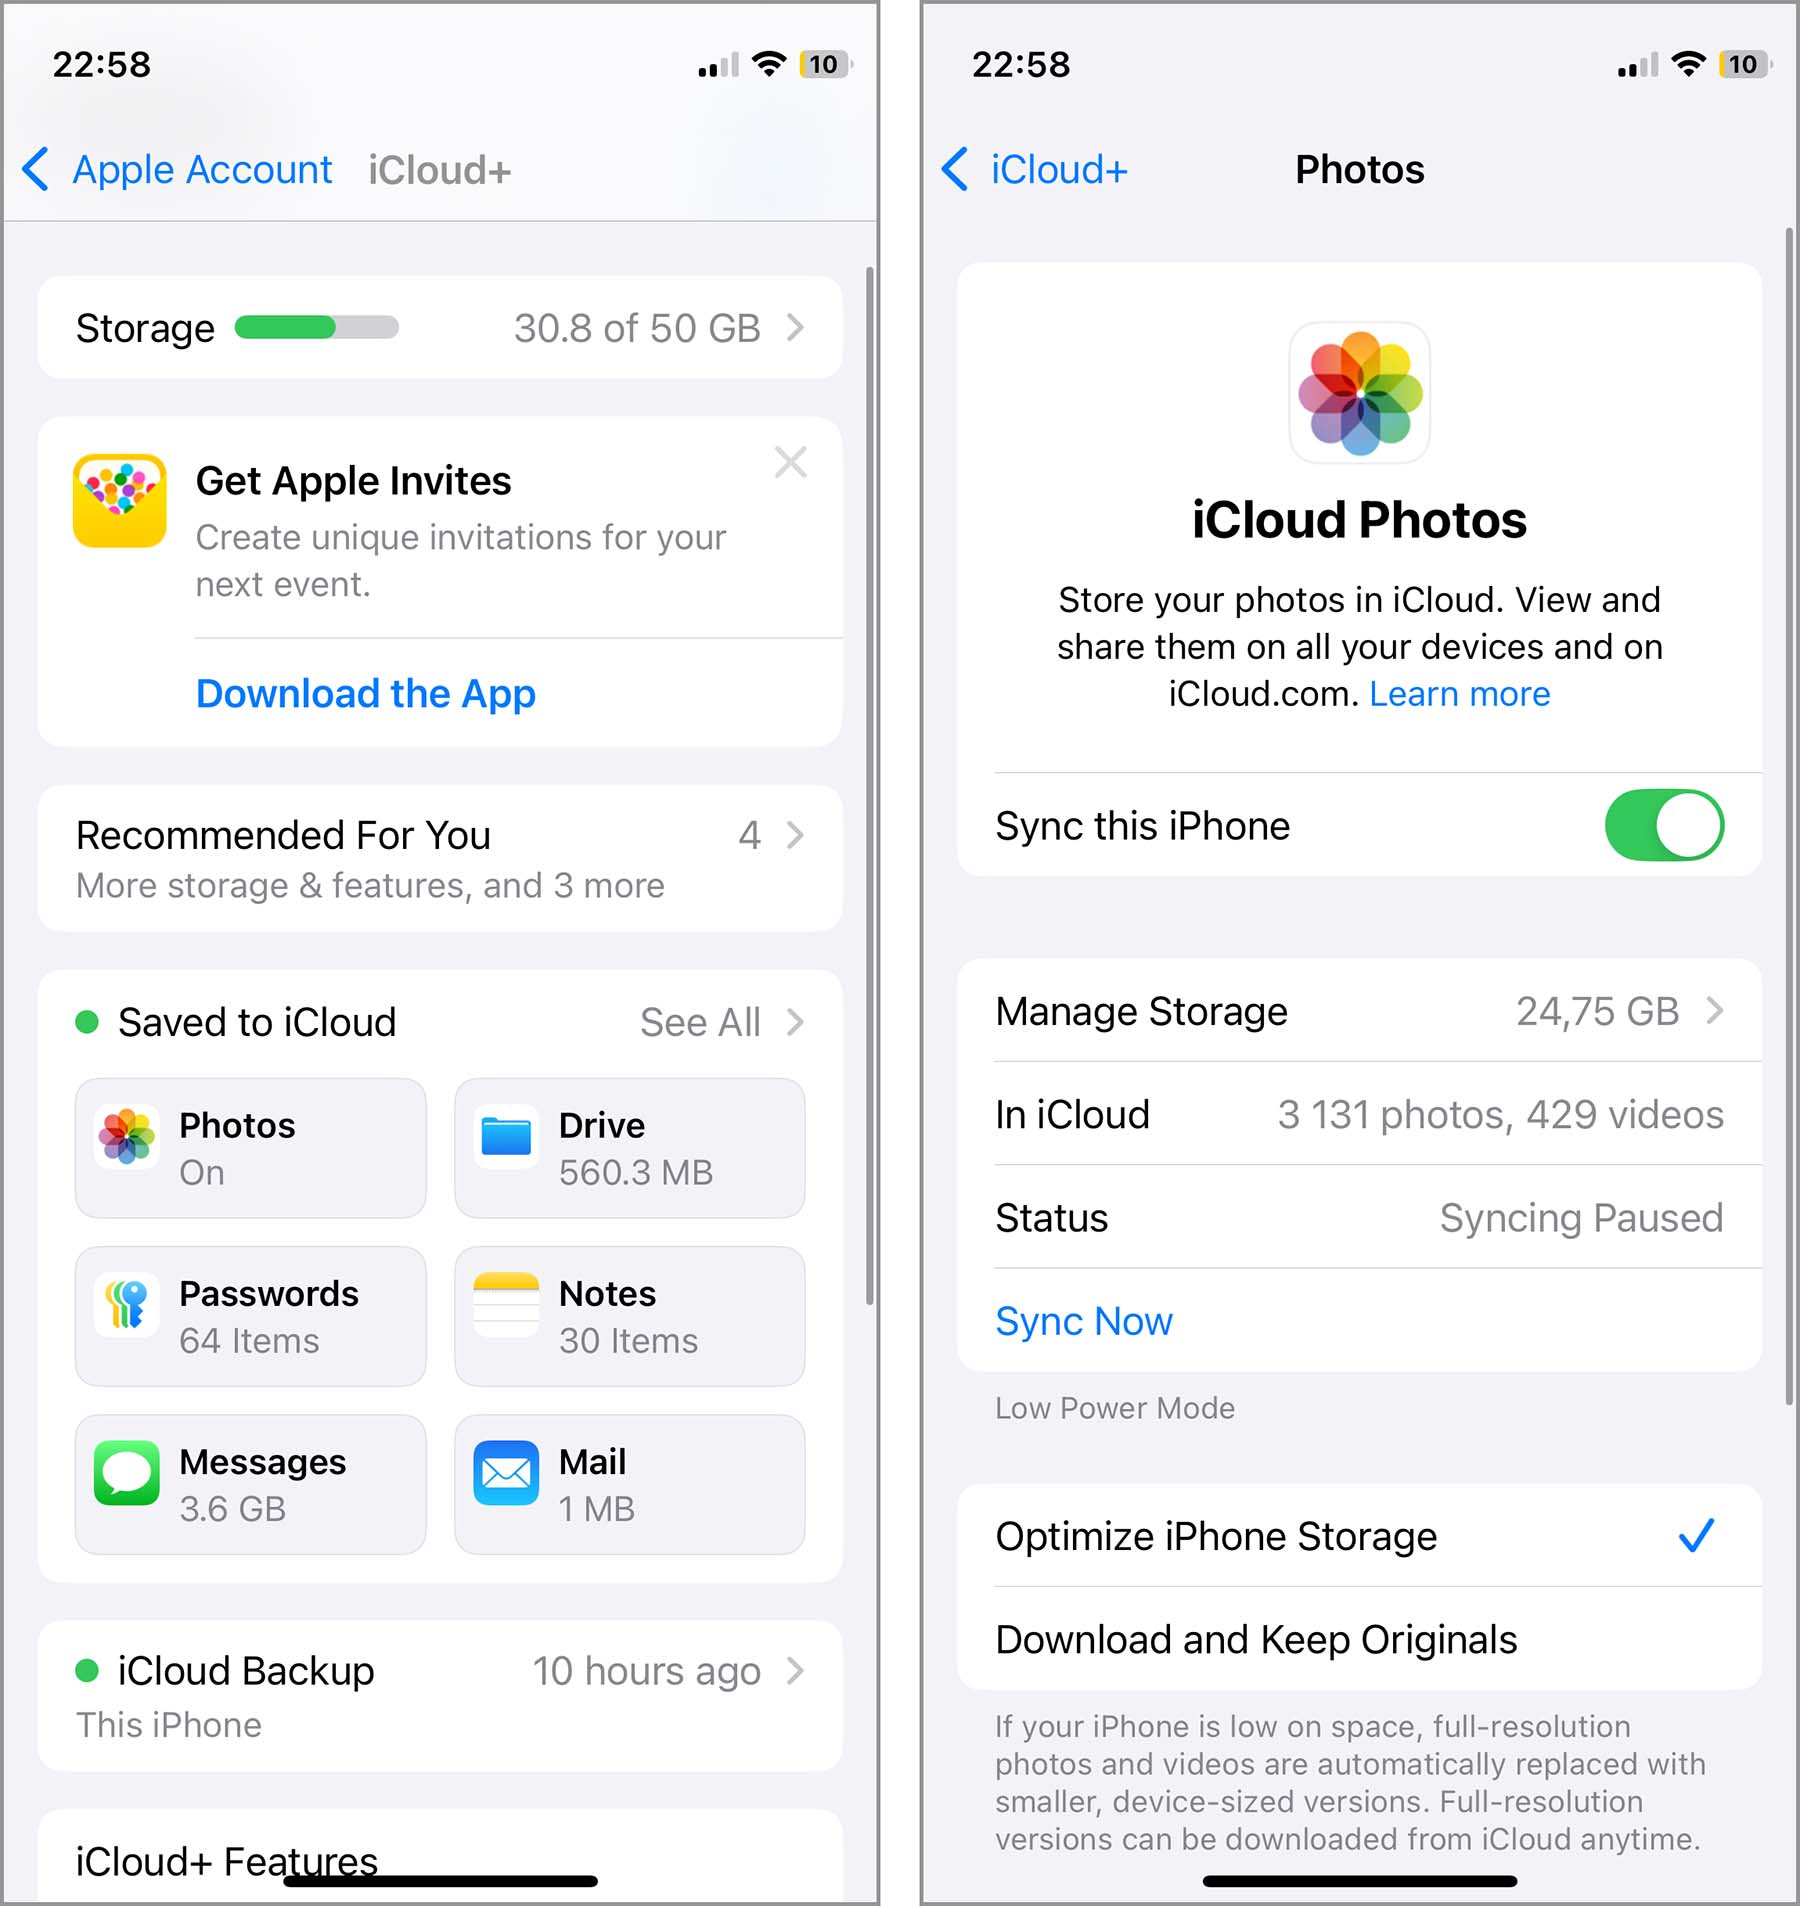
Take iCloud, for example. It’s fully built into Apple devices and keeps everything synced across your iPhone and Apple’s servers. One handy feature is ‘Optimize iPhone Storage.’ When you turn it on, your photos and videos get uploaded to iCloud, and the originals are replaced with smaller, space-saving previews on your phone. If you ever need the full-quality version, you can just re-download it. One thing to remember is if you delete a photo from your iPhone, it’ll also be removed from iCloud (and vice versa). So, this is a great option if your goal is simply to free up local space without actually losing any content.
- Open the Settings app on your iPhone.
- Tap your name at the top, then go to iCloud.
- Select Photos, then turn on iCloud Photos.
- Confirm Optimize iPhone Storage is enabled – this will kick off the syncing process and free up space on your device.
Other common cloud storage choices include Google Drive and Dropbox, which aren’t integrated into Apple’s system in the way that iCloud is. Though you can initiate syncing with your iPhone, these services also don’t replace your original files with thumbnails – they simply store more copies in the cloud. So, if you remove a file from your iPhone, it’ll remain safe in the cloud. This can be really useful if you don’t want to store something on your phone but are not quite ready to delete it, like finished projects you’ve sent to a client but might still need to tweak later. Here’s how to use Google Drive for that:
- Download the Google Drive app from the App Store and install it.
- Open the app and sign in or create an account if you don’t already have one.
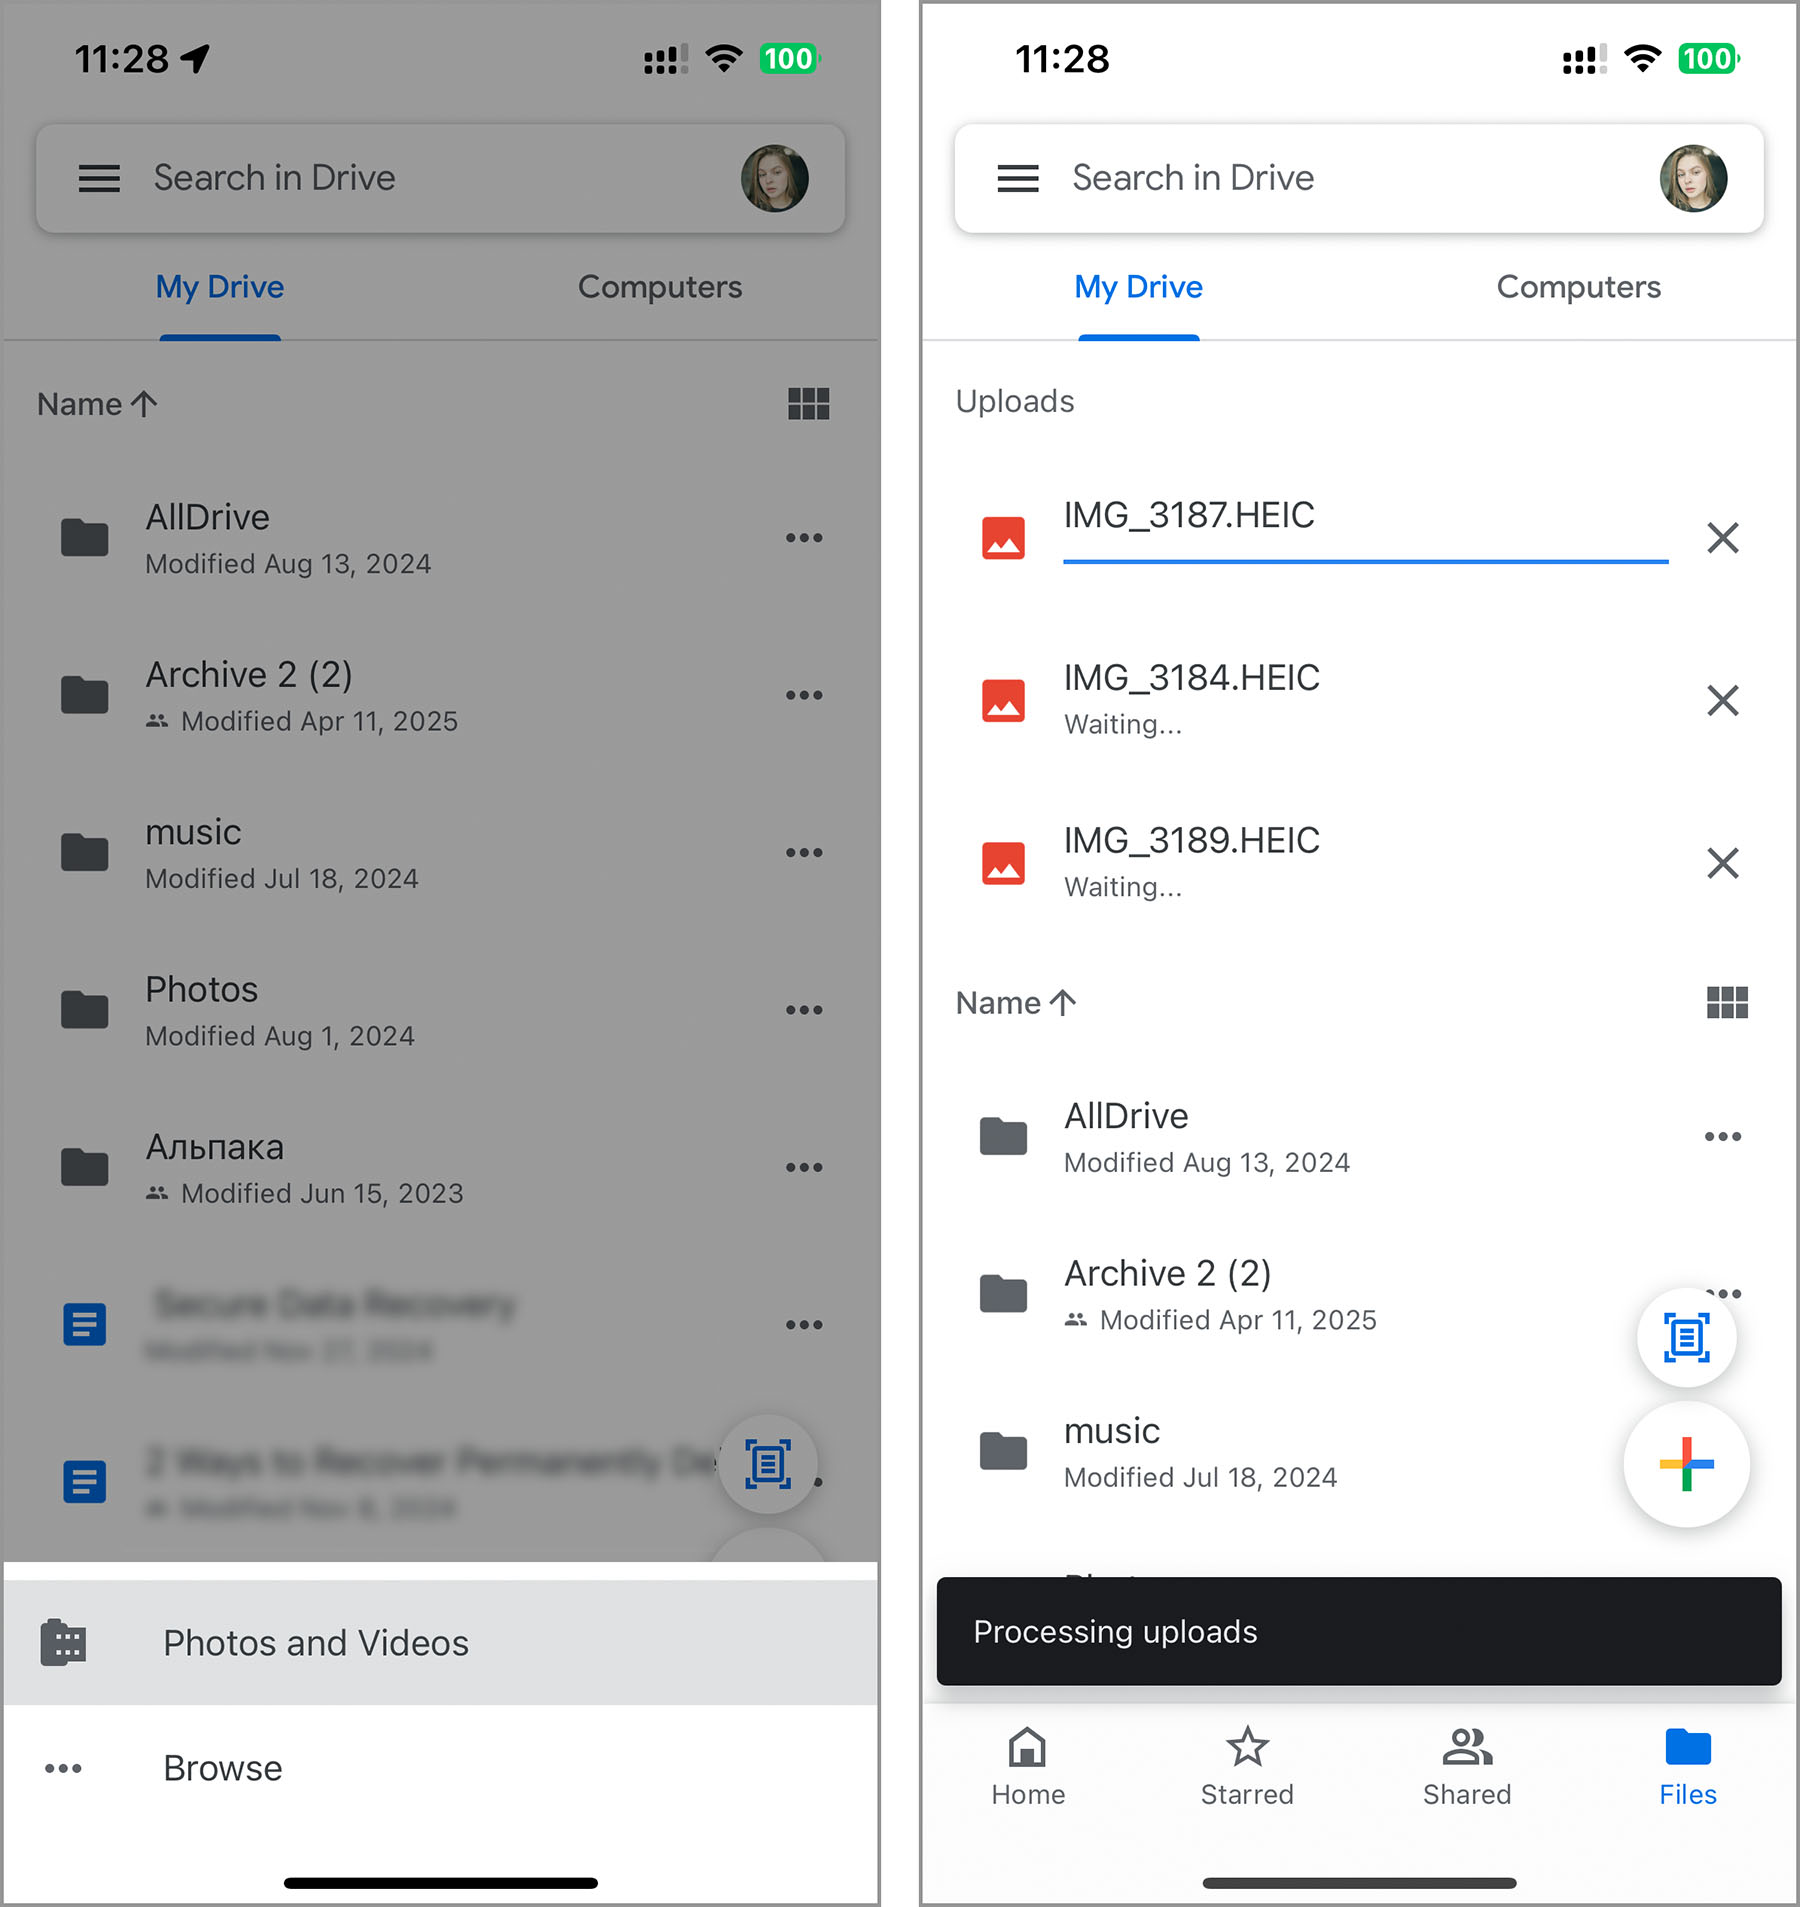
- Press the ‘+’ icon, then choose ‘Upload file’ and select ‘Photos and Videos’ or ‘Browse’ if uploading other files.
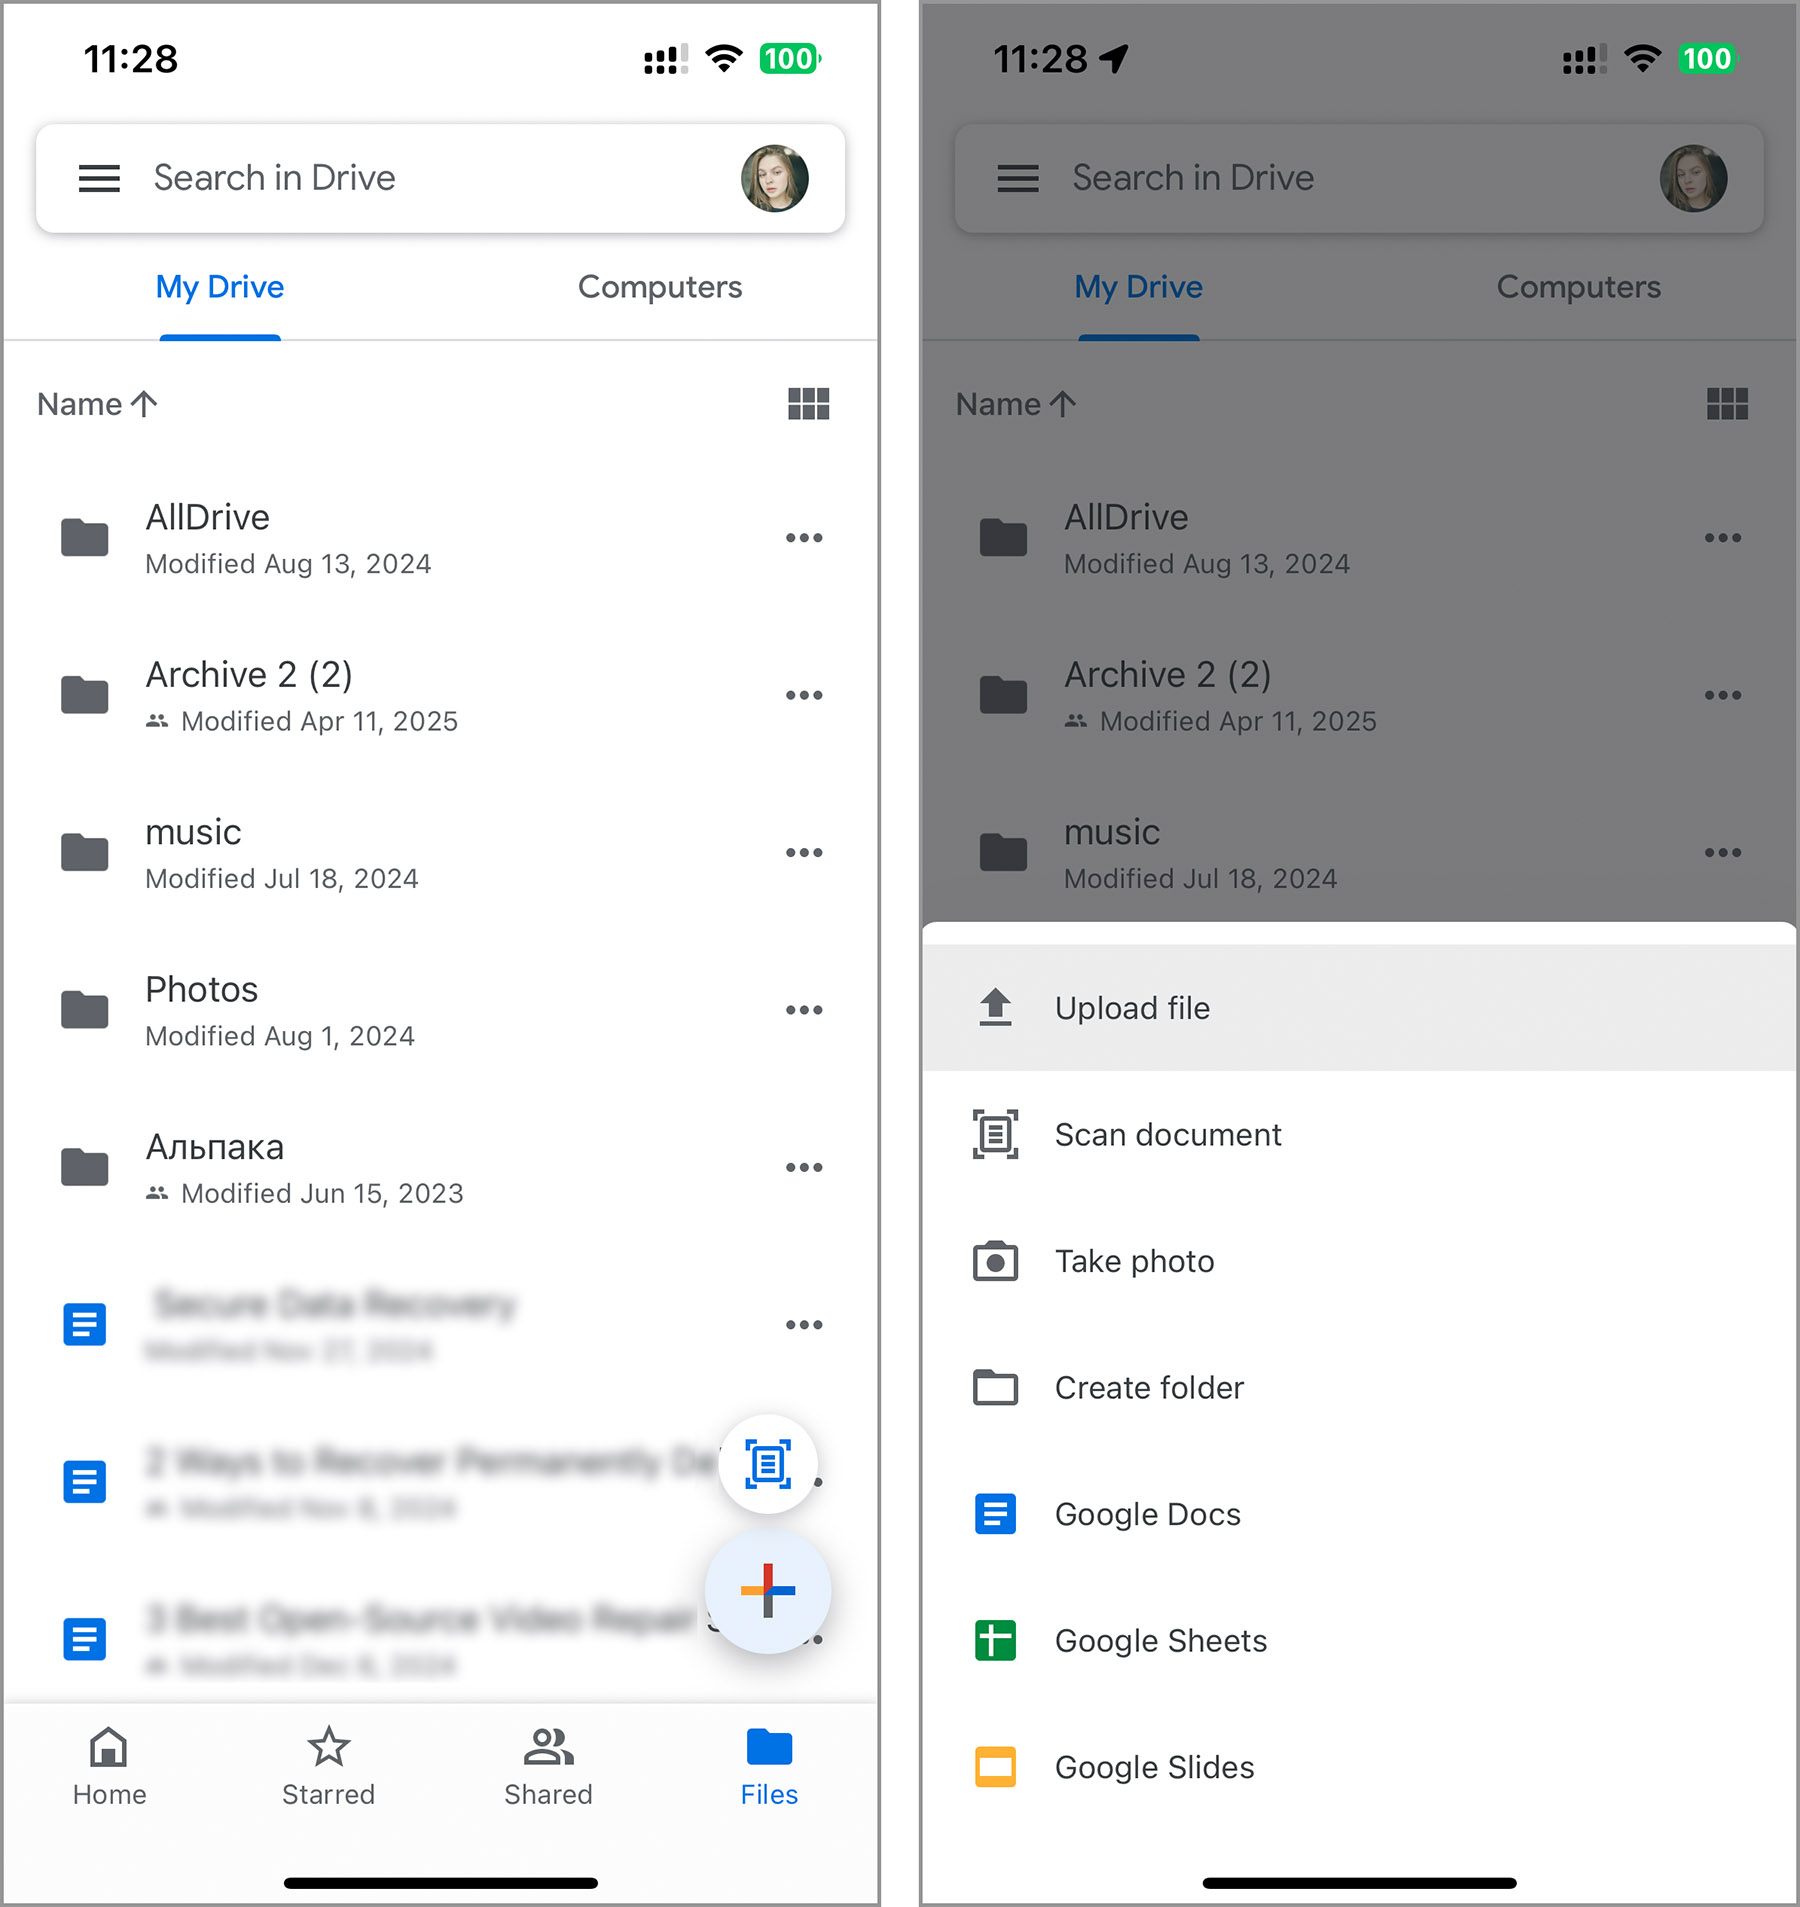
- Pick the files or images you want to back up from your iPhone.
- Once everything’s uploaded, you can manage your files right from the app or log in to Google Drive on your computer.
Clear the Cache in Your Browser and Other Applications
Apps probably take up the biggest chunk of storage on your device, so managing them (and their data) is a smart way to clean up iPhone storage. The storage an app takes up isn’t just from the time the app was downloaded, it’s also data and cache that accumulates over time as you use the app. Usually, that extra data makes apps run more fluidly and load more quickly, but excess or outdated data turns out to have the opposite effect. Apps could begin to lag, freeze, or take an eternity to load content.
One of the biggest space hogs on your iPhone is usually your browser. If you don’t clear its cache and web data once in a while, it stores everything from job search results (LinkedIn, Upwork, etc.) to all sorts of other data. We’ll show you how to clear the cache using Safari, the iPhone’s default browser, but if you use something else like Chrome or Opera, the steps are similar. Just remember you’ll need to look in the app’s own settings rather than your iPhone’s.
- Open the Settings app on your iPhone.
- Scroll down, tap Apps, and look for Safari in the list.
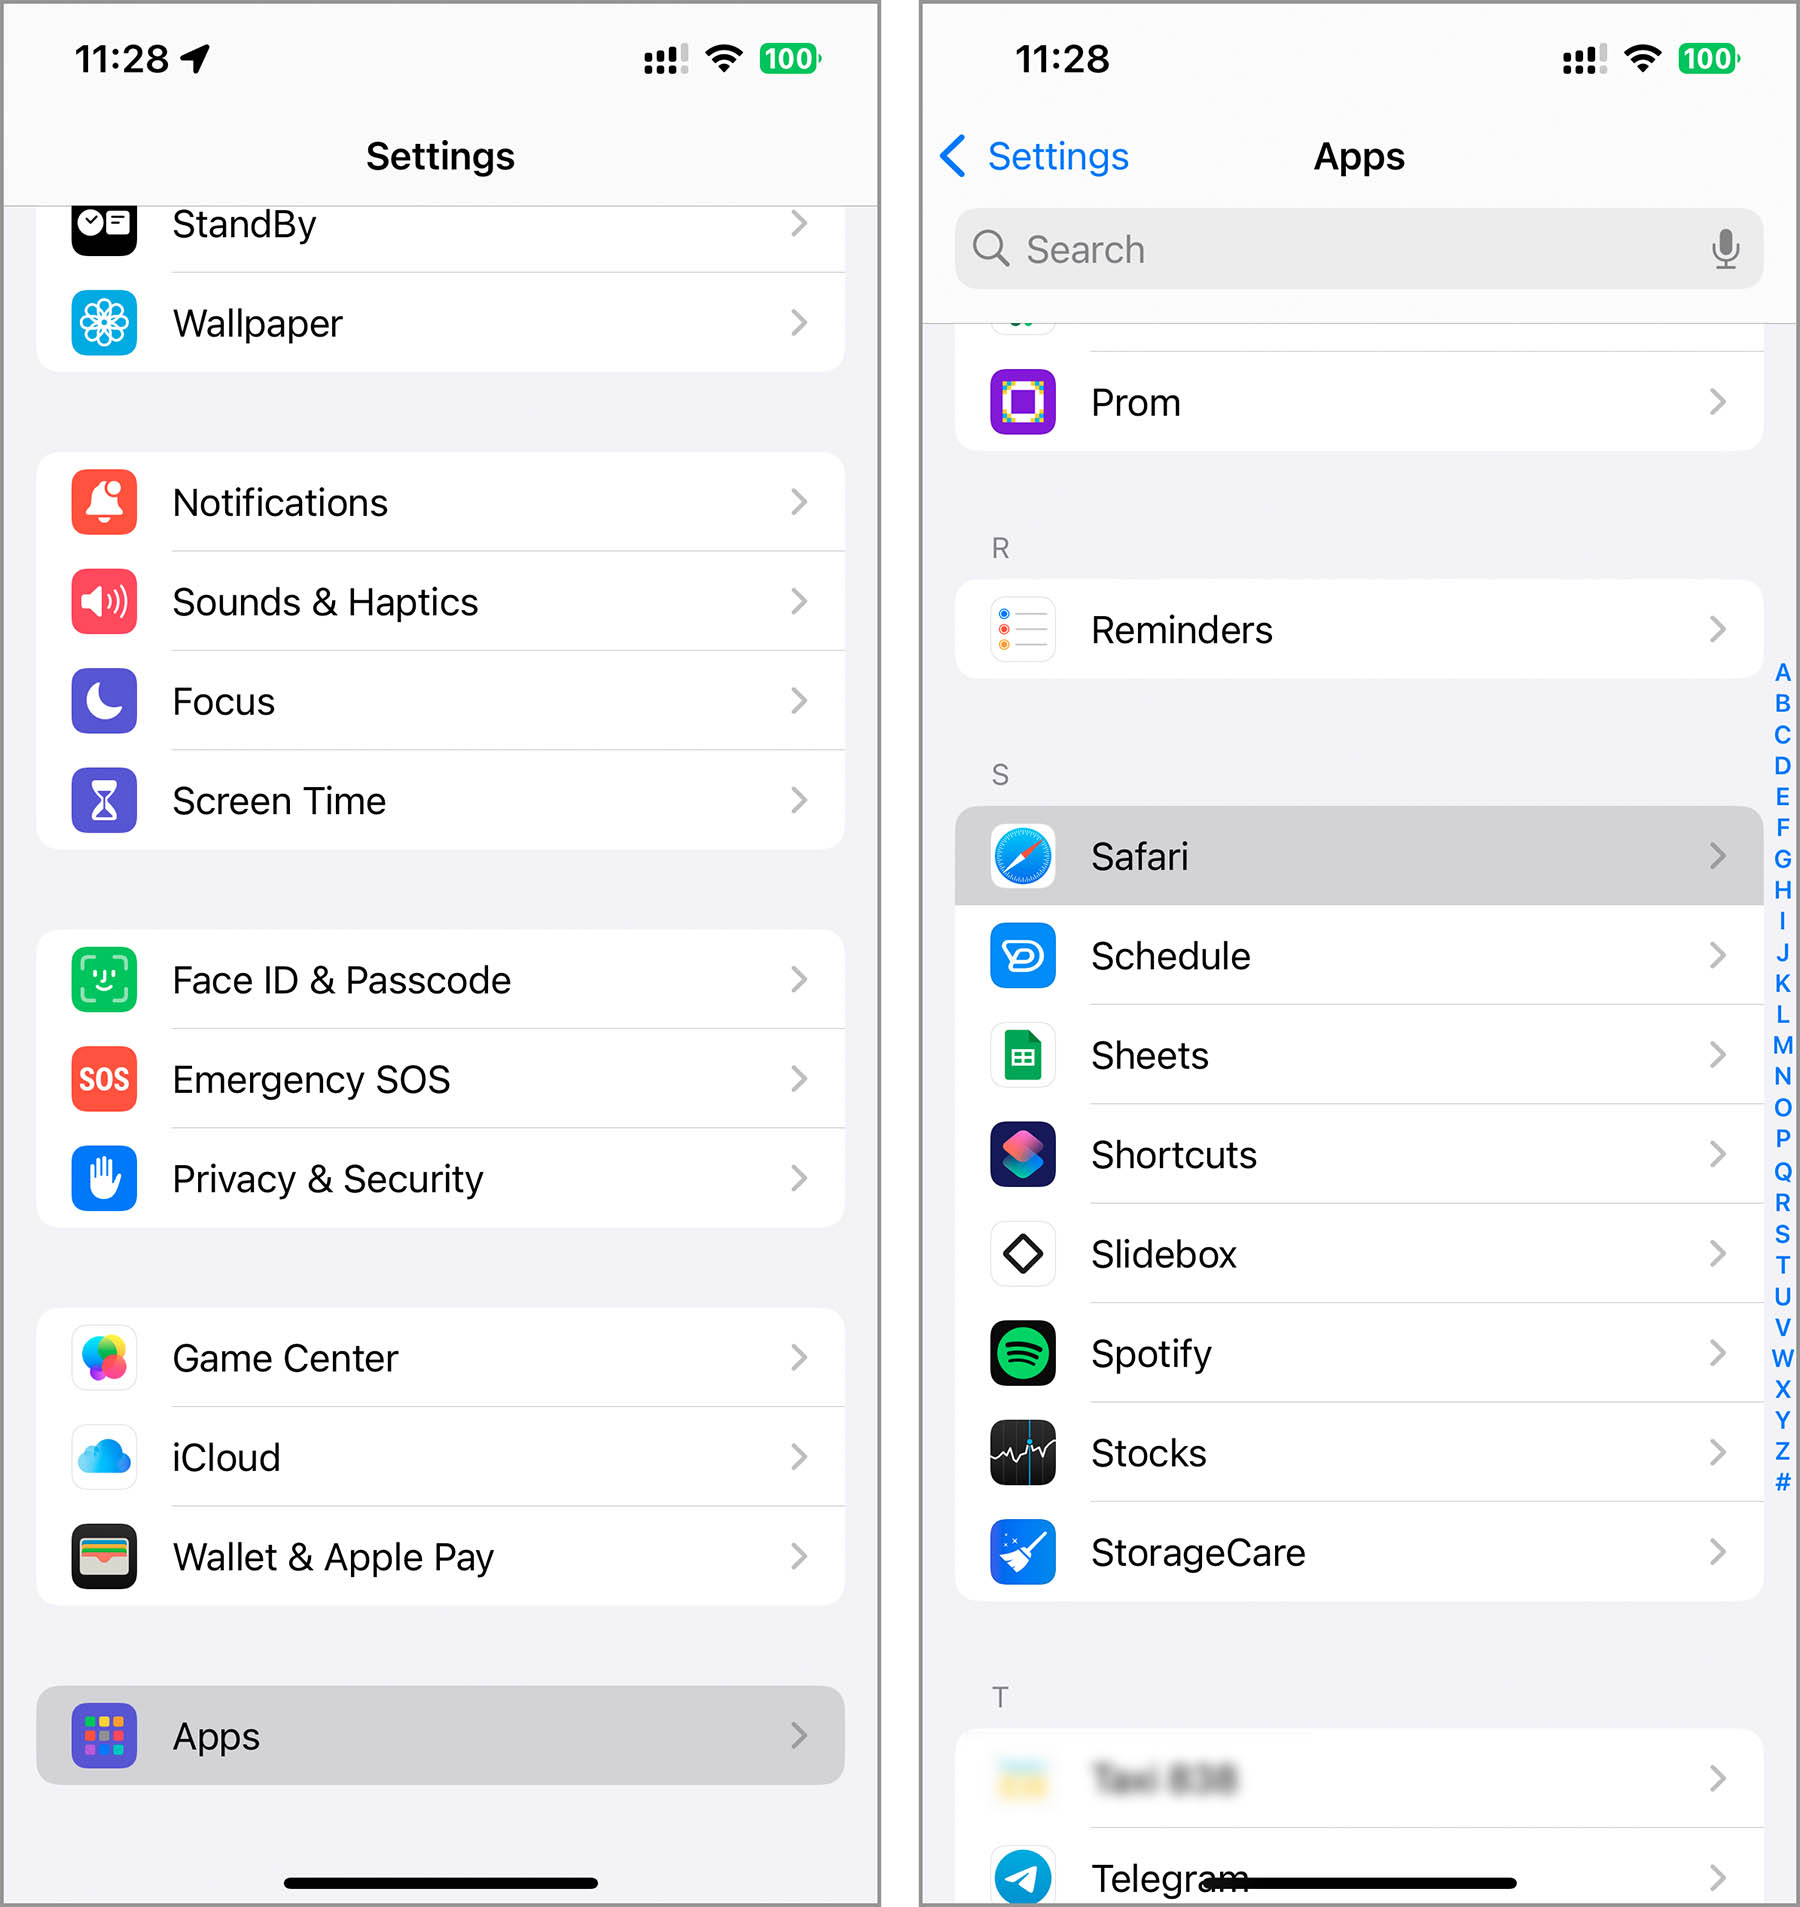
- In Safari’s settings, scroll down and tap Clear History and Website Data.
- You’ll see a dialog that lets you pick how far back you want to clear your history and data. Select the time range you prefer.
- Finally, tap the red Clear History button to confirm.

Other apps, especially messengers you use for client communication or social networks where you find inspiration, also collect cache data. Unlike browsers, though, not all have a built-in option to clear it. You’ll have to check each app individually. Here’s how you clear the cache in Telegram, for example:
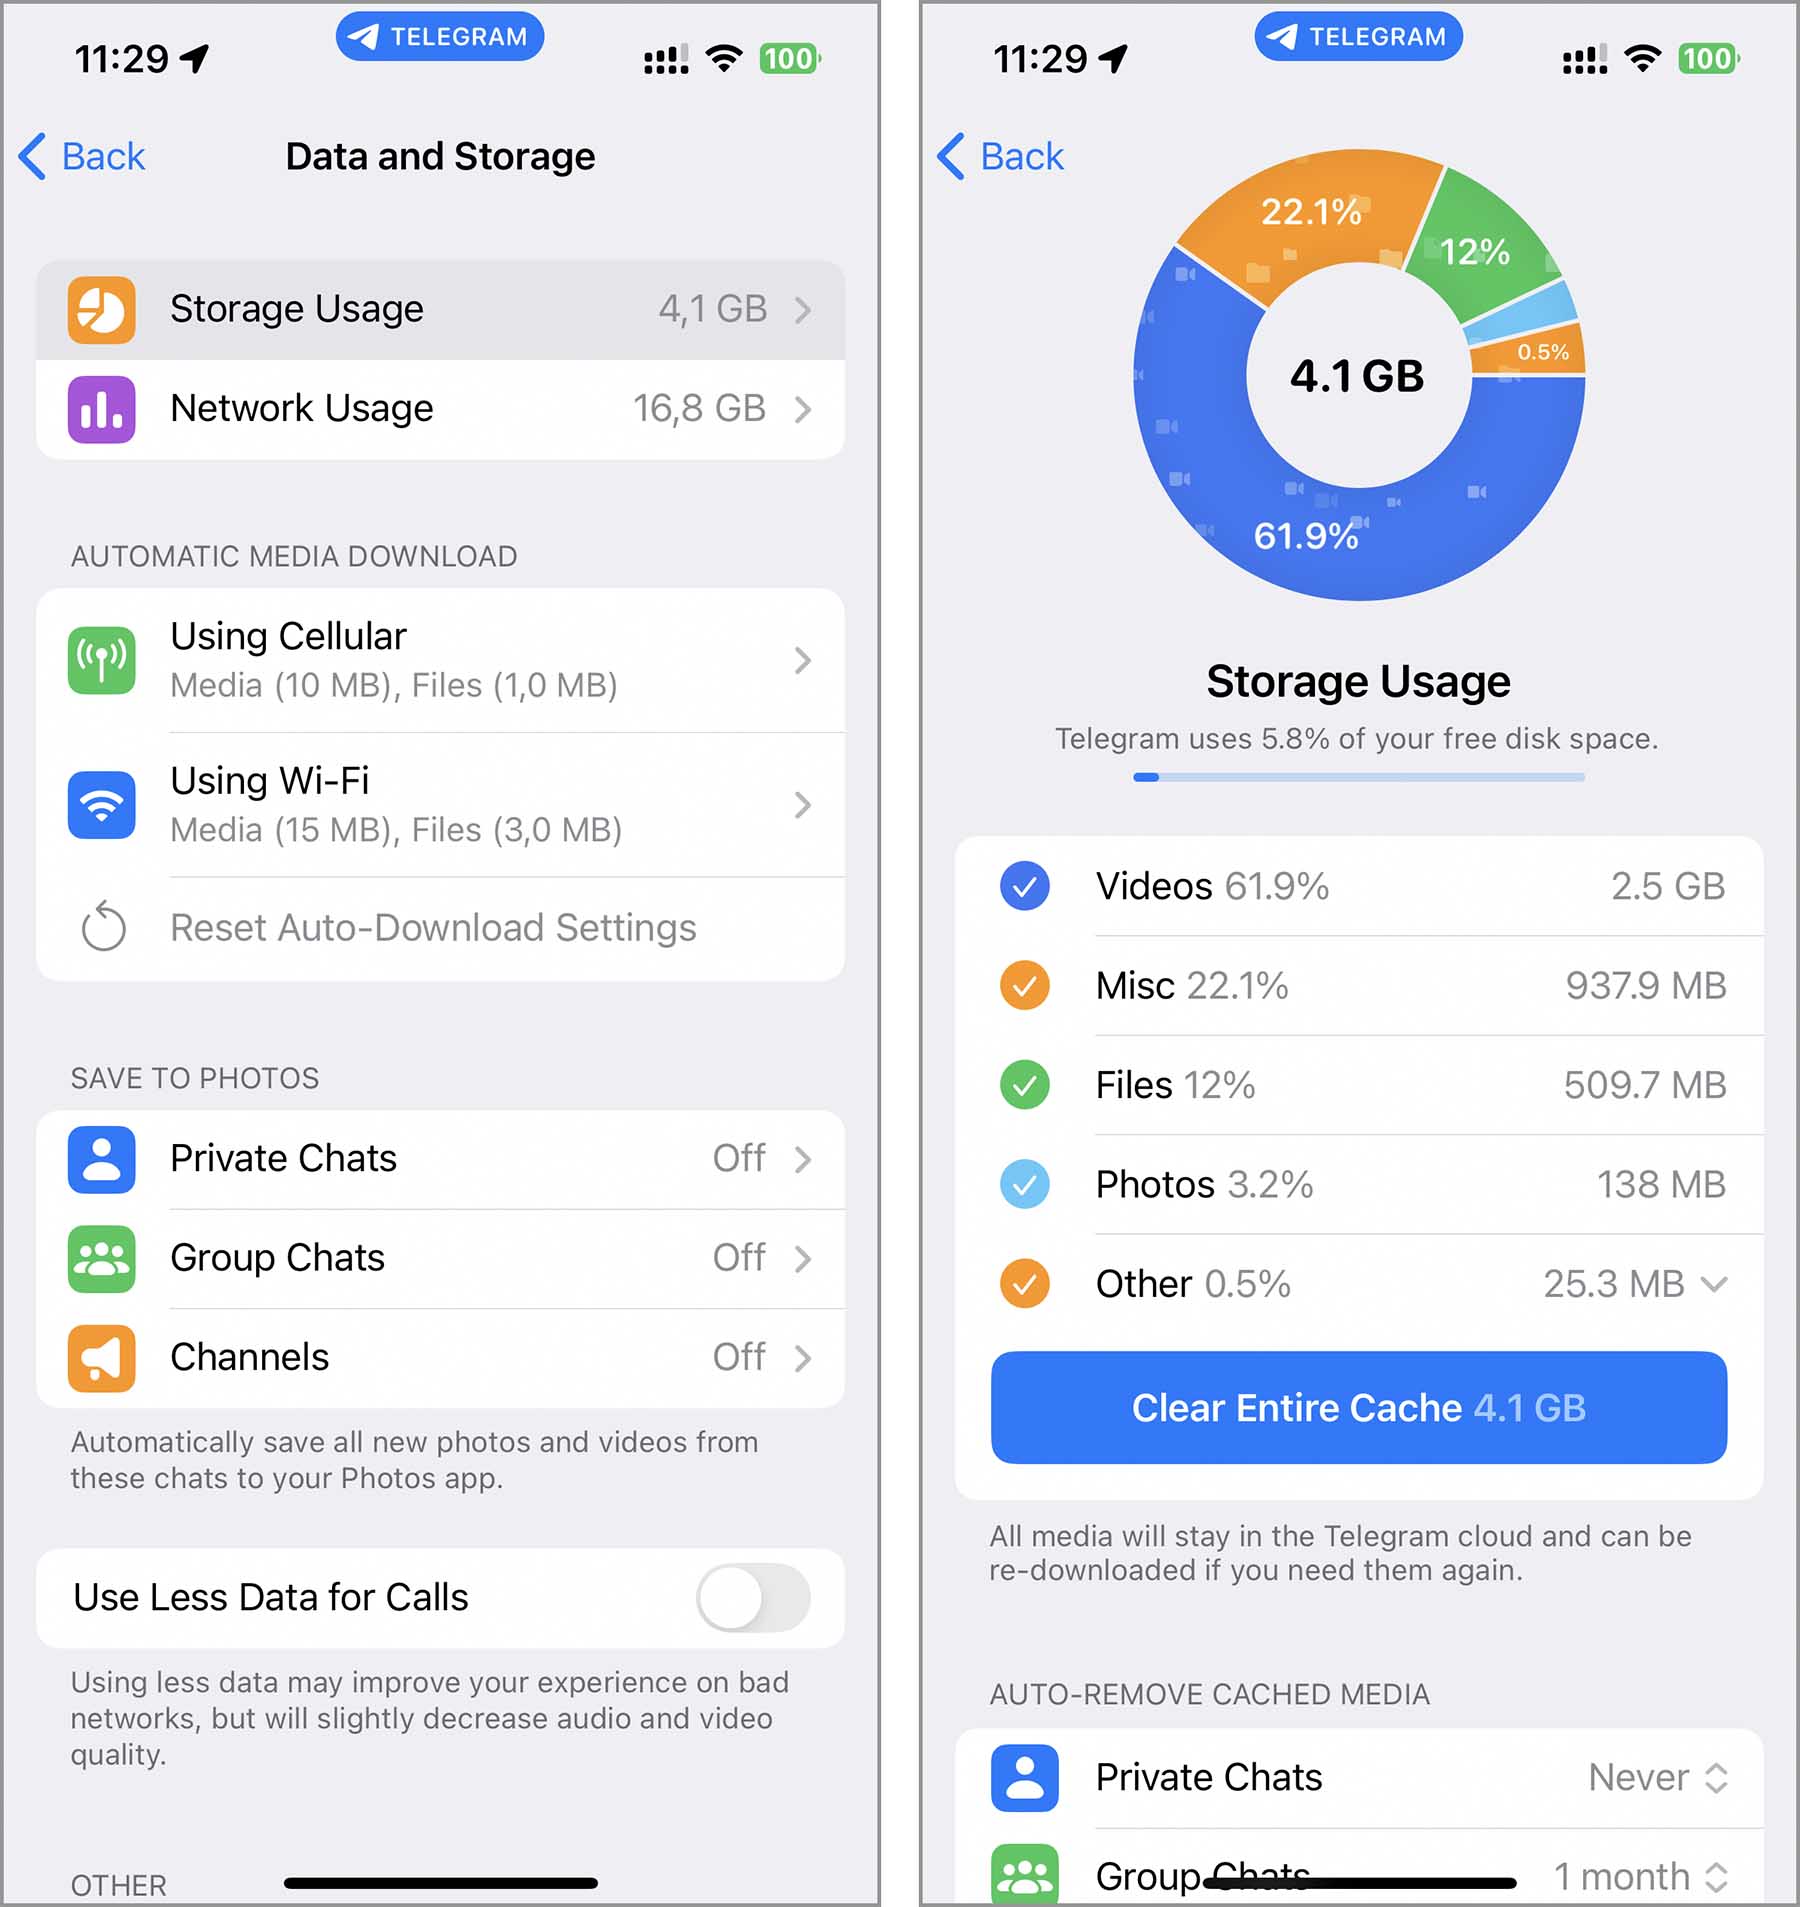
- Open Telegram on your iPhone.
- Tap Settings (found in the bottom right corner).
- Select Data and Storage and tap Storage Usage.
- Choose Clear Entire Cache to remove cached files.
If the app doesn’t offer a cache-clearing feature, or if you just don’t want to spend time hunting for it, you can simply reinstall it (we’ll explain how in the next section).
Delete Unnecessary Applications
While clearing cache and data is effective for applications you frequently use, it’s often better to delete apps that you haven’t opened for a long time. This action not only removes the application but also erases all the data it has accumulated. Although you can uninstall apps directly from the home screen, we’ll provide a more detailed method through the settings that allows you to sort apps by the date of last use.
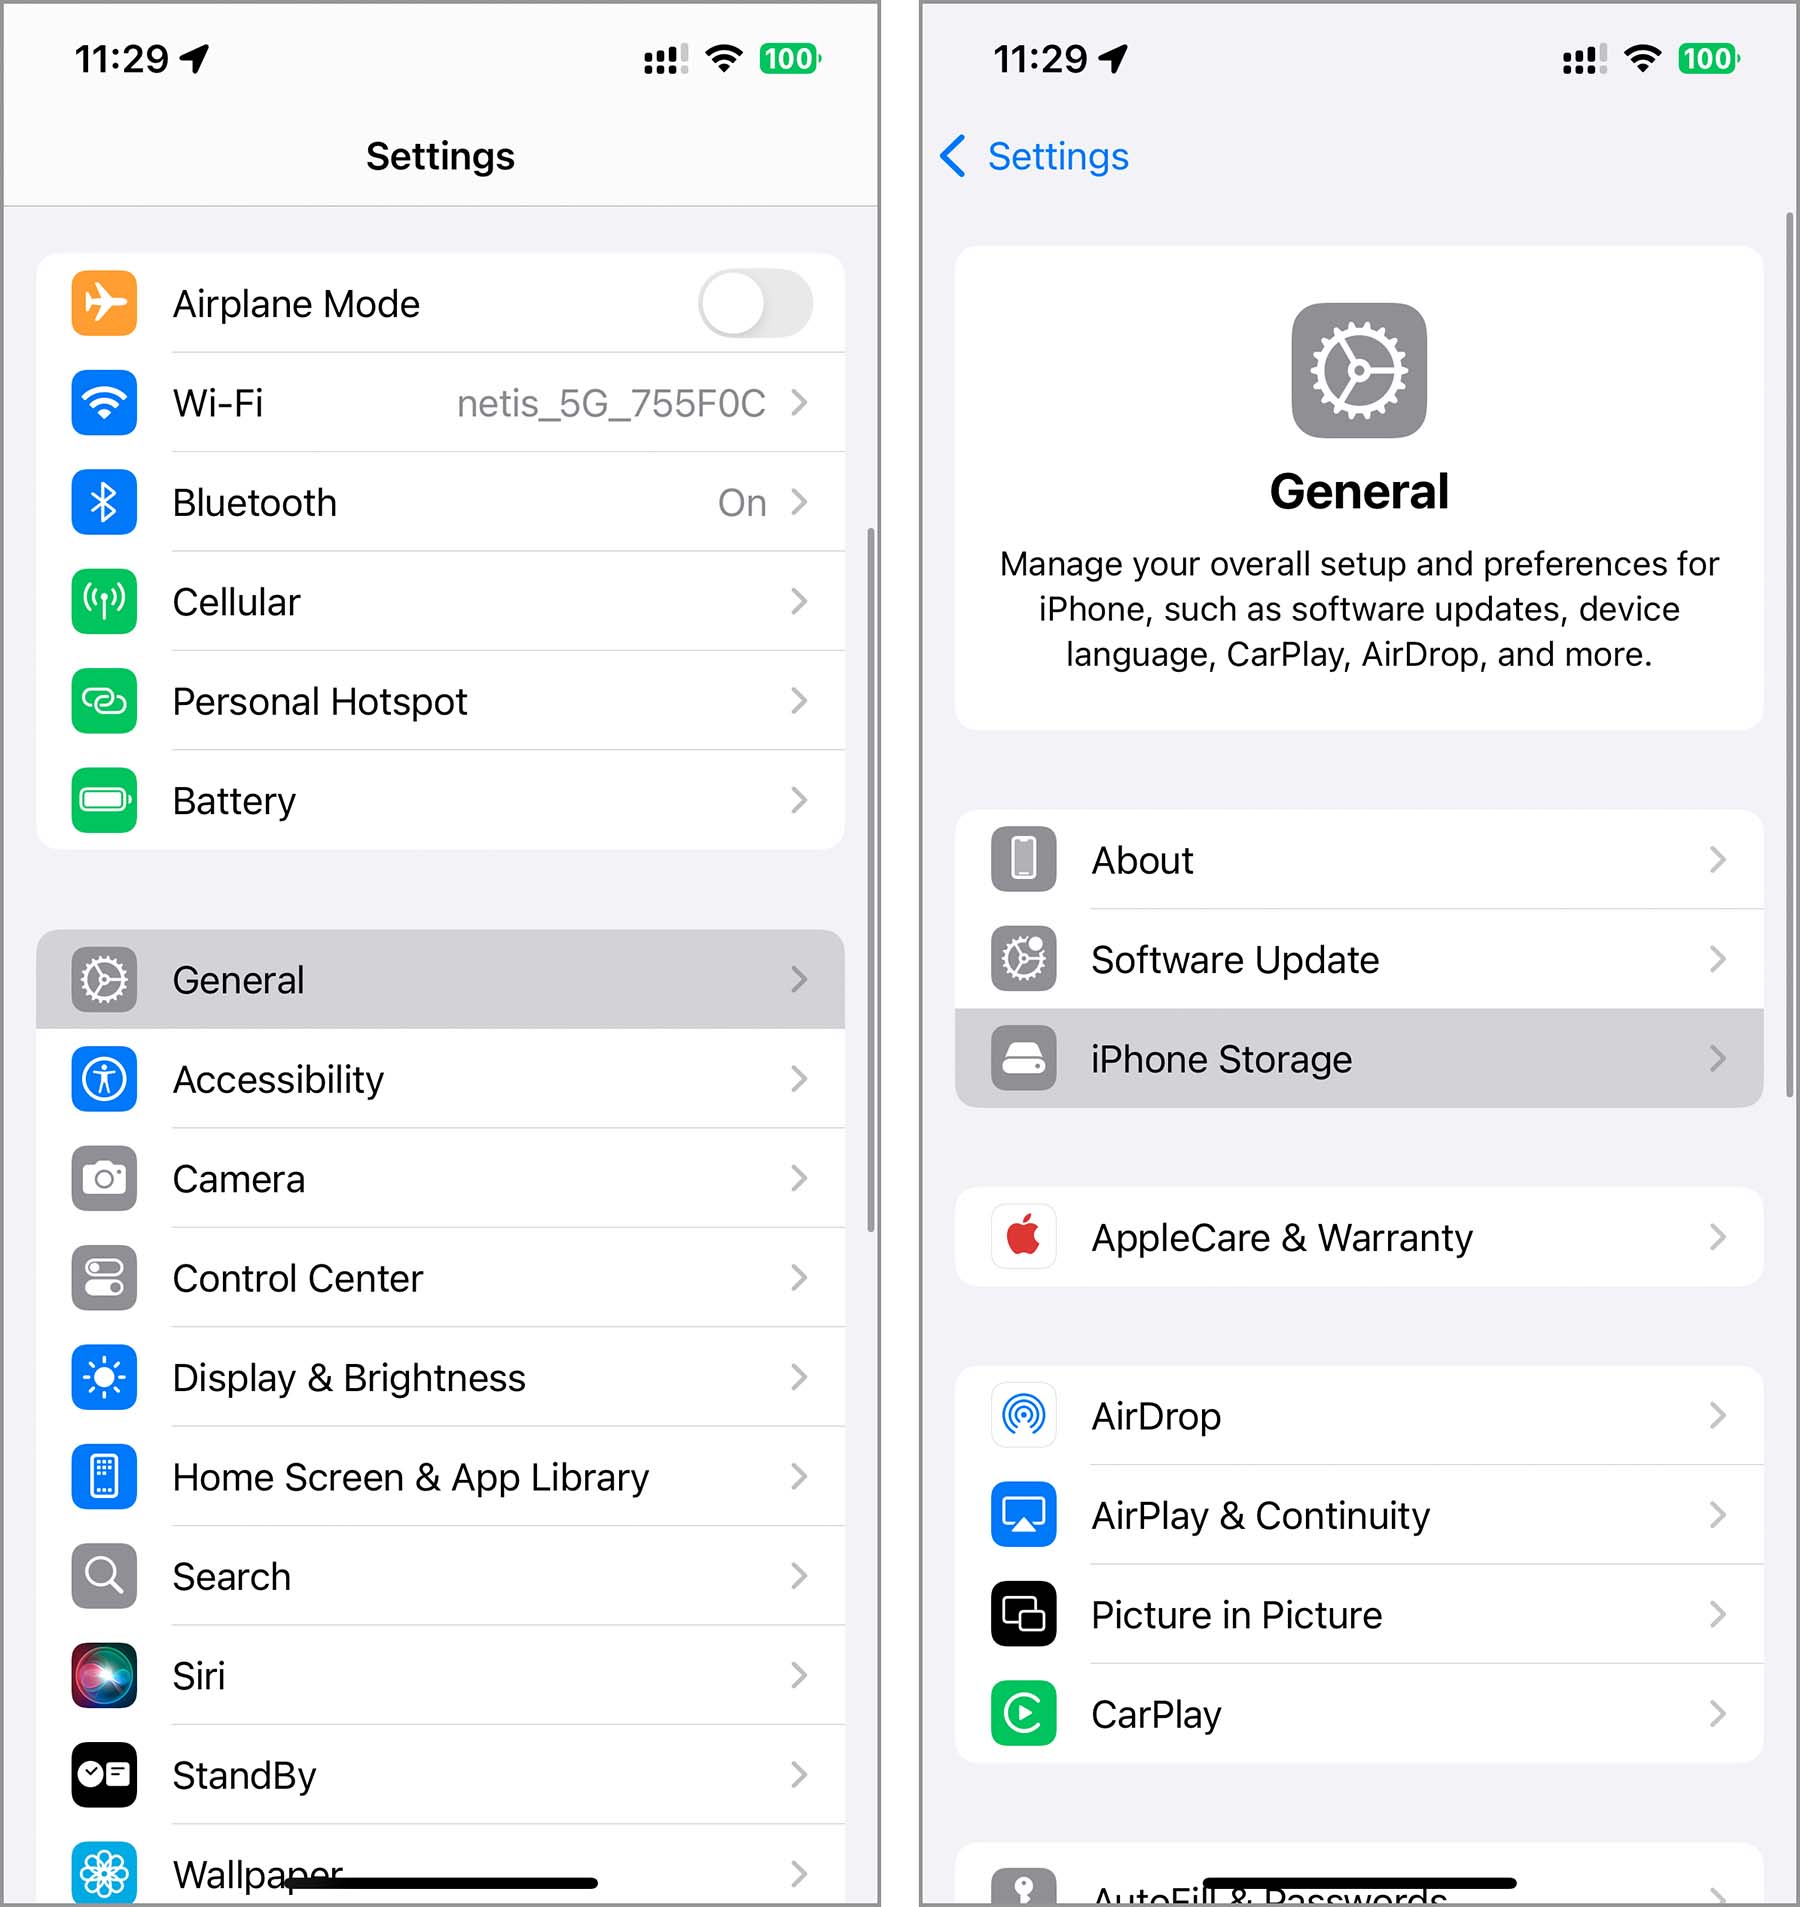
- Open the Settings app on your iPhone.
- Tap General, then choose iPhone Storage. You’ll see a list of all the apps installed on your phone.
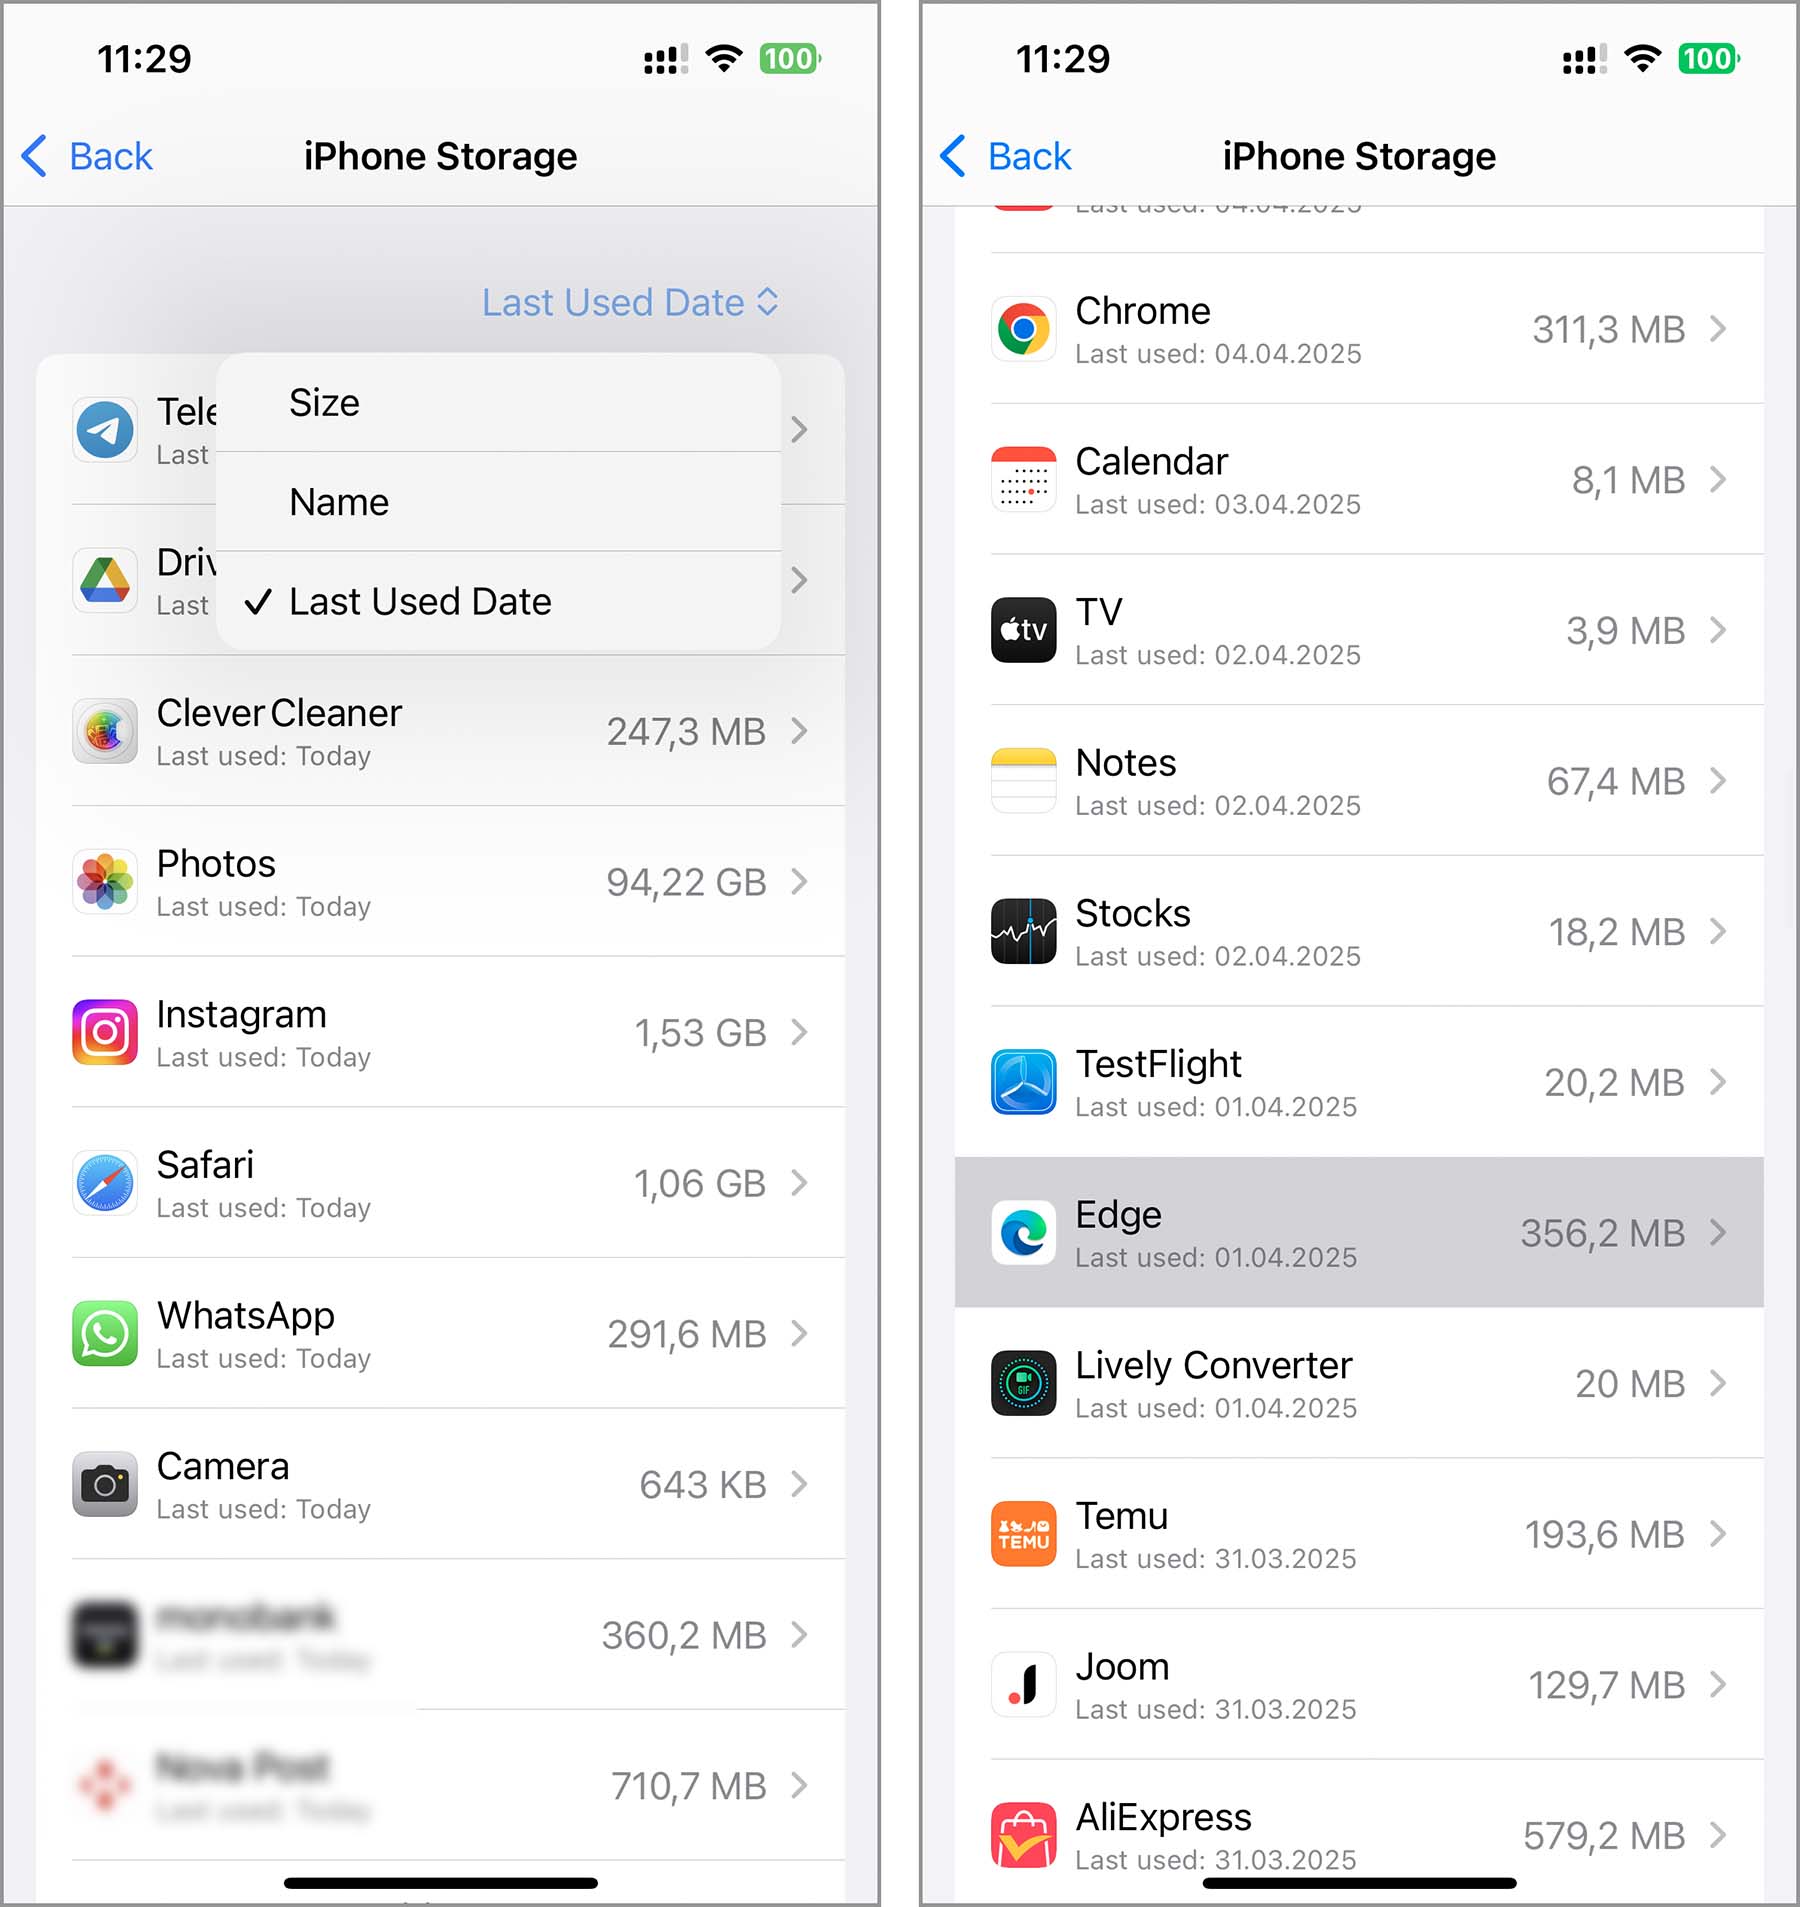
- Near the top, tap Last Used Data in the top-right corner to sort apps by when you last opened them. Apps you haven’t used in a while will show up at the bottom.
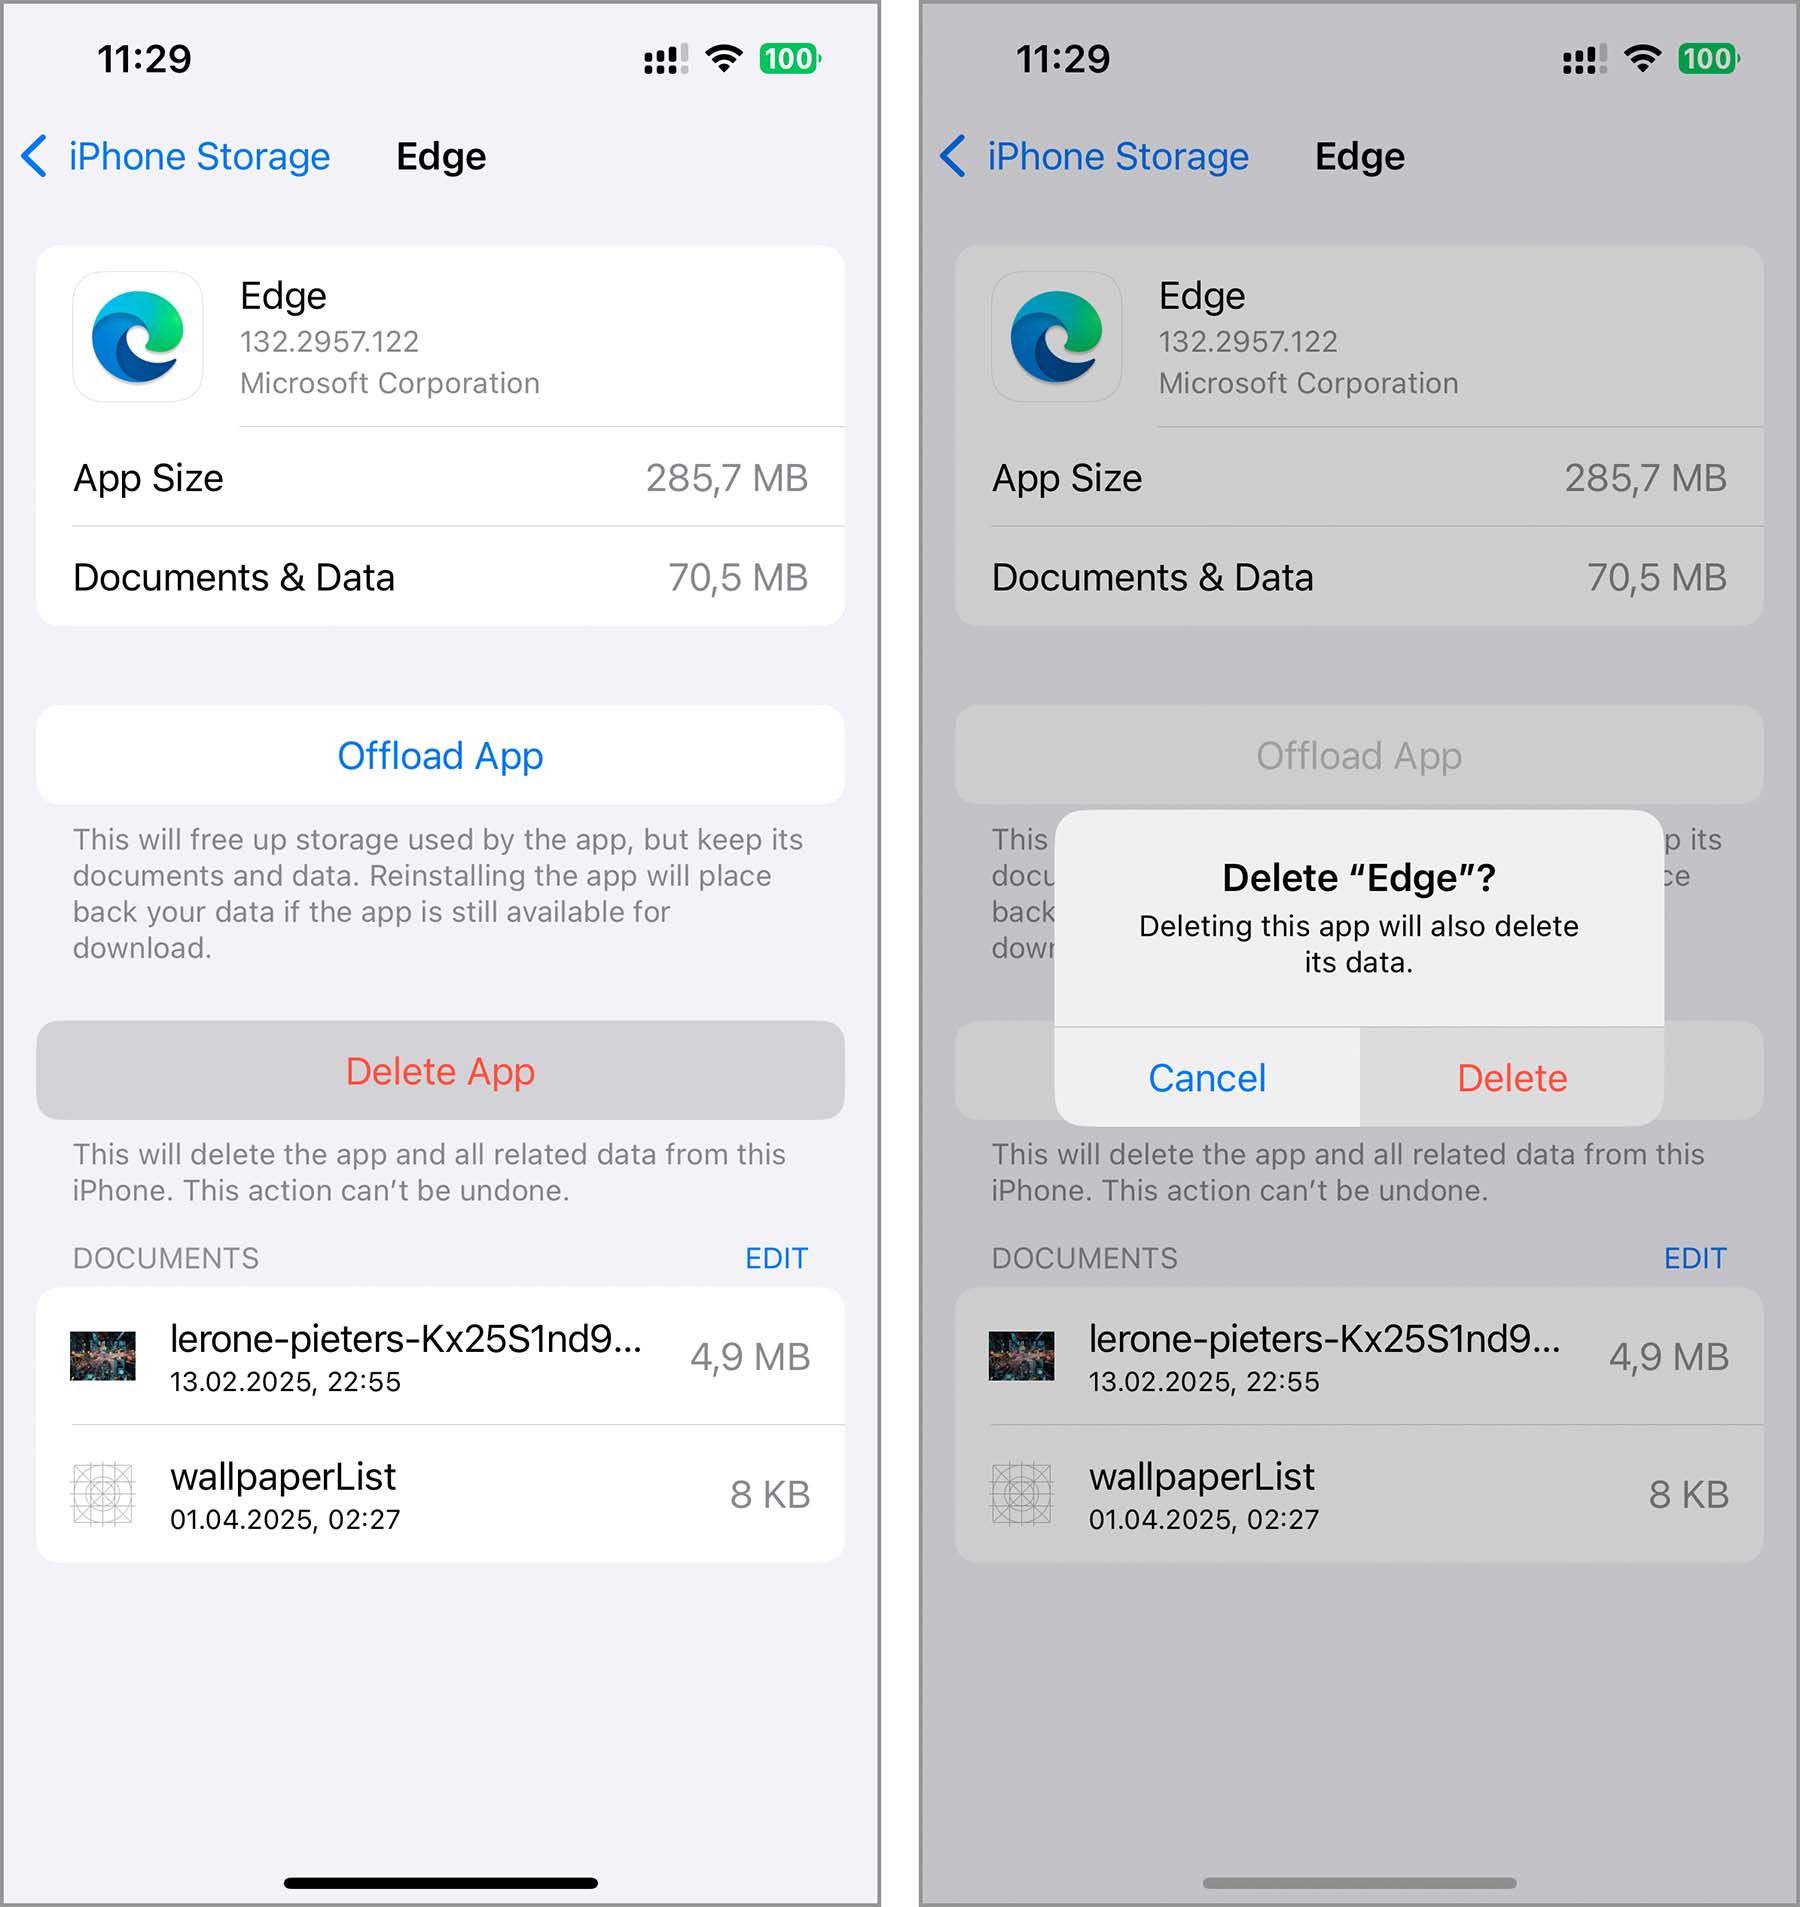
- Select the app you want to delete for a detailed view of its storage usage.
- Tap Delete App at the bottom of the screen. Confirm to remove the app and all its data.
- If you deleted the app to clear its cache and want to reinstall it, open the App Store, search for the app, and tap the cloud icon (with a downward arrow) to download it again.
In the screenshots, you might’ve noticed a button called ‘Offload app.’ Tapping it removes the app itself (and part of the cache) but keeps all of its data on your iPhone. So if you decide to reinstall that app later, it’ll pick up right where you left off, for instance, a photo editing app would still have all your templates and presets saved.
Final Thoughts: Don’t Stop Cleaning Up Your iPhone Storage
We have outlined general methods to free up iPhone storage quickly so that you can accomplish more at work. However, there are additional locations and files that you should inspect and clear of unnecessary items:
- Files app stores downloaded photos and videos that do not go into the Photos app, along with other files like archives, documents, and PDFs. Often, files that you used once and then forgot about remain here. Inspect these items and delete those you no longer need.
- If you frequently send or receive multimedia attachments through the Mail and Messages apps, remember these are not stored directly in your iPhone’s storage but they do take up space. Review all conversations and delete those that are no longer needed, or remove just the attachments.
- If you enjoy working while listening to podcasts, music, or various videos in the background, check the applications you use for these activities for old downloads that you will not listen to or watch again.
Lastly, a bit of advice – if you find it difficult to balance work and rest due to frequent notifications on your iPhone, consider setting up Focus Mode. In this mode, you can specify a list of users and applications from which you want to receive notifications during working hours. This setup can help reduce unnecessary distractions, which allows you to concentrate more effectively on your tasks.

Keep the conversation going...
Over 10,000 of us are having daily conversations over in our free Facebook group and we'd love to see you there. Join us!