
If you provide any sort of service or product to a client or customer, then you need to properly learn how to write an invoice.
Learning how to write an invoice can be incredibly simple, but there are undoubtedly a few key elements you’ll want to be sure to include when making an invoice.
Taking these important steps when learning how to write an invoice will ensure you’re more likely to get paid on time and protect yourself legally.
This article will explain the ins and outs of writing an invoice and provide a simple 5-step formula for making your first invoice. We’ll also include a few examples of successfully written invoices for you to review.
👀 The way clients search for freelancers has changed — stay visible across Google, ChatGPT, and AI platforms with Semrush One and land your next freelance client. Click here to see what you’re missing »
Let’s dive in:
1. Determine what tool you should use
The first step to take when learning how to write an invoice is determining which tool you’ll use.
While this may not seem like a big deal, the invoicing app you choose will dramatically influence how easy it is to write your invoice and how effective it is.
When preparing to learn about invoicing as a freelancer, you’ll also want to consider a few long-term questions like:
- Where will I store the invoices that I write?
- How will I manage multiple invoices, ensuring all of them get paid in a timely manner?
- How will I send the invoices I write to my clients or customers?
All of these questions will impact which tool you’ll choose to use to write an invoice.
Here are our top recommendations (based on years of freelancing ourselves and working with thousands of freelancers here on the blog.)
Google Docs, Microsoft Word, or Other Text Editor (FREE)
Of course, the easiest path when learning how to write an invoice is to use the most simple tool out there: a word processor.
For that, just pull out Google Docs, Microsoft Word, or some other text editor.
This makes for a good, simple choice because there are no complicated bells and whistles and no account to sign up for before learning how to write an invoice.
On the downside, it will take a bit more time to create an invoice from scratch in one of these programs (as opposed to the options presented next).
Invoice Generators
If you’d rather get super organized and be ahead of the curve when learning how to write an invoice, I actually recommend you use an invoicing app like Bonsai.
Bonsai
The first on my list of recommended tools for learning how to write an invoice (or rather, auto-generating quality invoices) is Bonsai.
What I love about Bonsai is just how attuned they are to the world of freelancing. They care A LOT about freelancers. They’re relatively small (compared to the two previously mentioned) but that allows them to give you great customer service. They have a 14-day free trial for freelancers.
All three of these premium options take the guesswork out of learning how to write an invoice by making it incredibly easy to generate them once you’re inside.
If Bonsai isn’t a fit for you (although for most freelancers and service providers it’s really quite perfect), you can try one of these:
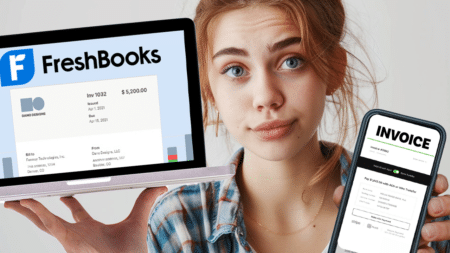
FreshBooks
FreshBooks makes generating invoices extremely quick. Once you have a FreshBooks account (they also have a 30-day free trial) and you’ve set up your information, you can literally generate new invoices in 30 seconds or less.
Here’s what’s really cool: they’ll also send reminders to clients who forget to pay your invoices. There’s no point in taking all this time to learn how to write an invoice and how to send it to a client if they never pay it in the end, right?
Honeybook
Another great option for learning how to write an invoice and then manage those client invoices is Honeybook. It’s pretty new to the scene (compared to FreshBooks) but they’re doing some good things.
Honeybook works particularly well for photographers, event planners, designers, and creative types. They also have a free trial.
Lili
Designed specifically for freelancers, Lili is a banking app that has all the great perks of a national bank, such as mobile check deposits, a mobile banking app, and a VISA debit card for easy purchasing. On top of that, easily manage your freelance business expenses on the fly, and set up a “Tax Bucket” — a set percentage of your income you choose to set aside for taxes. designed specifically for freelancers and small business owners.
It’s also great for sending invoices via the Lili Pro plan and helps you create, manage and organize your invoices from the Lili app. Click here to sign up for Lili.

The downside: you cannot access your account on the web (mobile only).
PayPal
Lastly, there’s PayPal. While it took a while, PayPal has finally stepped up and made some major recent improvements when it comes to invoicing. You can now make an invoice, generate recurring invoices, manage those invoices, and more all from your PayPal dashboard.
The downside is obvious: you have to pay PayPal a percentage of every single invoice that gets paid. So while the service itself is free to sign up for, you’ll never be done paying PayPal.
This is particularly a problem if you’re writing large-sum invoices. 2-3% of $30,000 is a lot of money just to send one invoice. You may find that a flat fee option like FreshBooks or Honeybook works better.
More options for writing an invoice
If none of the choices listed above seems to work when learning how to write an invoice, you can always review our list of the 15 Best Freelance Invoice Apps on the Market Right Now.

2. Decide the payment terms of the invoice
Before you can complete the rest of this tutorial on how to write an invoice, you need to have a conversation with your client about the payment terms of the invoice itself.
The payment terms, simply put, are the guidelines you and the client both agree to regarding when, how, and how much your client will pay.
Here are the most common terms you’ll want to be familiar with:
Due on Receipt vs Net D
To perhaps oversimplify, when you’re learning how to write an invoice for the first time, you should probably choose between making the invoice “Due on Receipt” or using a “Net D” payment term.
“Due on Receipt” is pretty self-explanatory. At its most basic level, it means your client should process the invoice immediately once they receive it. That doesn’t necessarily mean you’ll get paid the same day you submit the invoice, but it should happen pretty quickly.
If you’re learning how to write an invoice for the first time, you may not be familiar with “Net D.”
To put it simply, “Net D” means the client doesn’t have to pay you for “D” days—usually 30 days (Net 30), 60 days (Net 60) or 90 days (Net 90).
Regardless of what you choose, remember, these terms should be negotiated with your client BEFORE you write an invoice.
Tip: If you put “Net 30” on your invoice and expect to get paid within 30 days of sending the invoice, think again. Traditional Net 30 means you’re paid 30 days after you deliver your final project.
Not a great option for freelancers and service providers.
Instead, you can set it to “Due on Receipt” (as mentioned above) or you can create your own hybrid and mark it as “Due 30 days after receipt” or simply include a due date when writing your invoice.
Payment due in full vs. Partial payments accepted
Another payment term you’ll want to discuss before learning how to write an invoice in full is whether your client pays for the complete project before you get started on it, or if you’ll accept partial payments.
Some freelancers and service providers will only work on a client project if they pay in advance. Which can be complicated if you’re working by the hour.
Other freelancers and businesses allow a partial “deposit” to be paid to generate the good faith and/or capital needed to start work on their project.
3. Include all important/relevant information
The next step when learning how to write an invoice is to gather any important information you might need in order to write your invoice.
It doesn’t really matter if you’re using a free option like Google Drive or a better option like FreshBooks. In both cases, you’ll need to have a few critical pieces of information.
As you can see in more depth in our freelance invoice template, there are a number of critical pieces of information you’ll need when getting ready to write an invoice.
They are:
Your name, business name, and/or logo
Your name (or the name of your business) should be front-and-centre, loud and clear for whoever is paying the invoice.
The word “INVOICE” in big letters near the top of the page
This is particularly important when you’re learning to write an invoice for large companies. Amid all the paperwork that people shuffle around their offices, you want to make sure they see the word “INVOICE” at the top of the page—alerting them that payment will be due.
Your client’s name and business name
Most companies require you to include their business name and other information (see below) primarily for record-keeping. When gathering info on how to write an invoice for a client you’ve never invoiced before, you may need to ask them what details they prefer to have written on the invoice itself.
Your client’s address
Most clients appreciate their address being added to the invoice, although it’s not always required.
Your contact information including address, phone number, email address, etc.
Naturally, in addition to your company name and/or logo, you’ll want to include your own contact information when writing an invoice. This provides critical information to the person paying the invoice in the event they have questions or concerns.
Invoice number or Order number
One element easily forgotten when learning how to write an invoice for the first time is the invoice number. The invoice number is particularly helpful if you have a client with multiple (current or future) invoices. If there are concerns or questions, they can simply call you up and ask about invoice 301, for example.
Tip: If this is your first time learning how to write an invoice, don’t make your invoice number #1. Or even #0001. That’s a dead giveaway that you have no idea what you’re doing.
Instead, start with a random number and then just add one each time (invoicing apps do this automatically). For example, when I first started as a freelancer, my original invoice was number #8190.
Invoice issuance date
Along with an invoice number, you’ll want to write the date you issued the invoice. This is particularly important when paired with your payment terms (below) since the speed with which you get paid is often determined by the invoice issuance date and the payment timeline terms.
Invoice payment terms (Net 30, Net 15, Due on Receipt, etc.)
When learning how to write an invoice for the first time, you may be tempted to copy/paste some information from invoice templates you find online—or to use the default settings in Honeybook (or whatever app you choose).
This can be dangerous when it comes to payment terms. The best scenario for you (Due on Receipt) is definitely not the best option for your clients (Net 30, Net 60 or even Net 90).
If possible, just write “Due on Receipt” on your invoice. If your client has issues with that, they’ll let you know.
Itemized list of all services rendered
Next, you’ll want to include a detailed list of exactly what your client is paying for on their invoice. Create a new line for each item (or hourly charge), including the cost per each (if applicable) and the total cost of each line. You’ll subtotal and final total below.
Additional notes or terms
If there are any additional notes or terms you want to include in your invoice, now’s the time. This might include terms such as “50% due now, 50% upon completion”—but you’ll want to discuss all of these terms with your client before you write an invoice.
Subtotal, taxes and fees (if any), and the final total
At the bottom, write a subtotal, any taxes and fees, and then the final invoice total.
Instructions on how to pay
Finally, it’s no use learning how to write an invoice if it’s not extremely easy for your client to pay. Include any relevant instructions and links for paying the invoice. Do they email you? Call you with a credit card? Pay online (FreshBooks, Bonsai, PayPal and others take credit card payments right within the invoice)? Make sure it’s 100% clear.
4. Generate & save your invoice
Guess what? You’re done learning how to write an invoice! That was pretty simple, right? The next step now is to generate your final invoice and then save it somewhere.
As mentioned before, using a service like FreshBooks or Honeybook can simplify this process since they’ll automatically store your invoice securely together in one place with all your other invoices.
If you choose to go the free route, that’s fine too. I recommend you save the invoices both “in the cloud” using something like Google Drive and on your device.
Store your invoices all in the same folder and consider using a name convention to easily find them later. Something like:
INV 8910 — Tim’s Tree Care — July 17, 2020 — DOR
5. Send your invoice to your client
Now that you’ve learned how to write an invoice and how to generate and store it properly, the only thing left to do is actually send your invoice to the client.
Aside from actually getting paid as a freelancer, this is the best part of learning how to write an invoice!
Sending an invoice can be a bit nerve-wracking, but it can also be a bit of a rush. Here are just a few things to keep in mind when sending your invoice:
Be professional & confident
Above all else, be professional and confident. If you’ve only recently learned how to write an invoice using the tutorial above, it may be tempting to make light of your invoice or not treat it with the gravitas it deserves.
But remember, this invoice (or rather the revenue it represents) is the lifeblood of your business. It’s important. Treat it that way.
Remind your client of the payment terms
When showing you how to write an invoice above, I recommended that you include the payment terms—in fact, most companies require it.
Do yourself a favor by also reminding them when sending the invoice when you expect to see your first payment and how much it should be. A simple, more casual, reminder ought to do. Something like:
“Hey, Jill. Here’s the invoice we talked about. Once you guys make that initial 50% upfront payment, we’ll be ready to get started. I’m excited to work together!”
Offer to answer any questions or concerns
The last thing you want—after taking all that time to learn how to write an invoice—is for your invoice details to be unclear. When sending, remind your client you’re happy to answer any questions or concerns they may have about the payment terms, line items, or any other details listed above.
Let your client know you’ll follow up
This final step is critical. Your client needs to know that you’ll be following up on this invoice to ensure it gets paid. Let them know you’ll follow up if the invoice goes past-due. You may even want to follow up a few days before to ensure timely payment.
As a reminder, in addition to simplifying how to write an invoice, tools like FreshBooks or Bonsai can send automatic email reminders for clients who forget to pay their invoices. In fact, I’m told that freelancers that use Bonsai get paid an average of 13 days faster. Pretty cool.
Getting paid & moving forward
Phew. That was a lot. But now you’ve learned all the ins and outs of how to write an invoice.
The next steps are to get paid and move forward with your project.
As you continue to book more clients, you’ll get more comfortable with the process of writing and sending invoices.
Good luck!
Keep the conversation going...
Over 10,000 of us are having daily conversations over in our free Facebook group and we'd love to see you there. Join us!